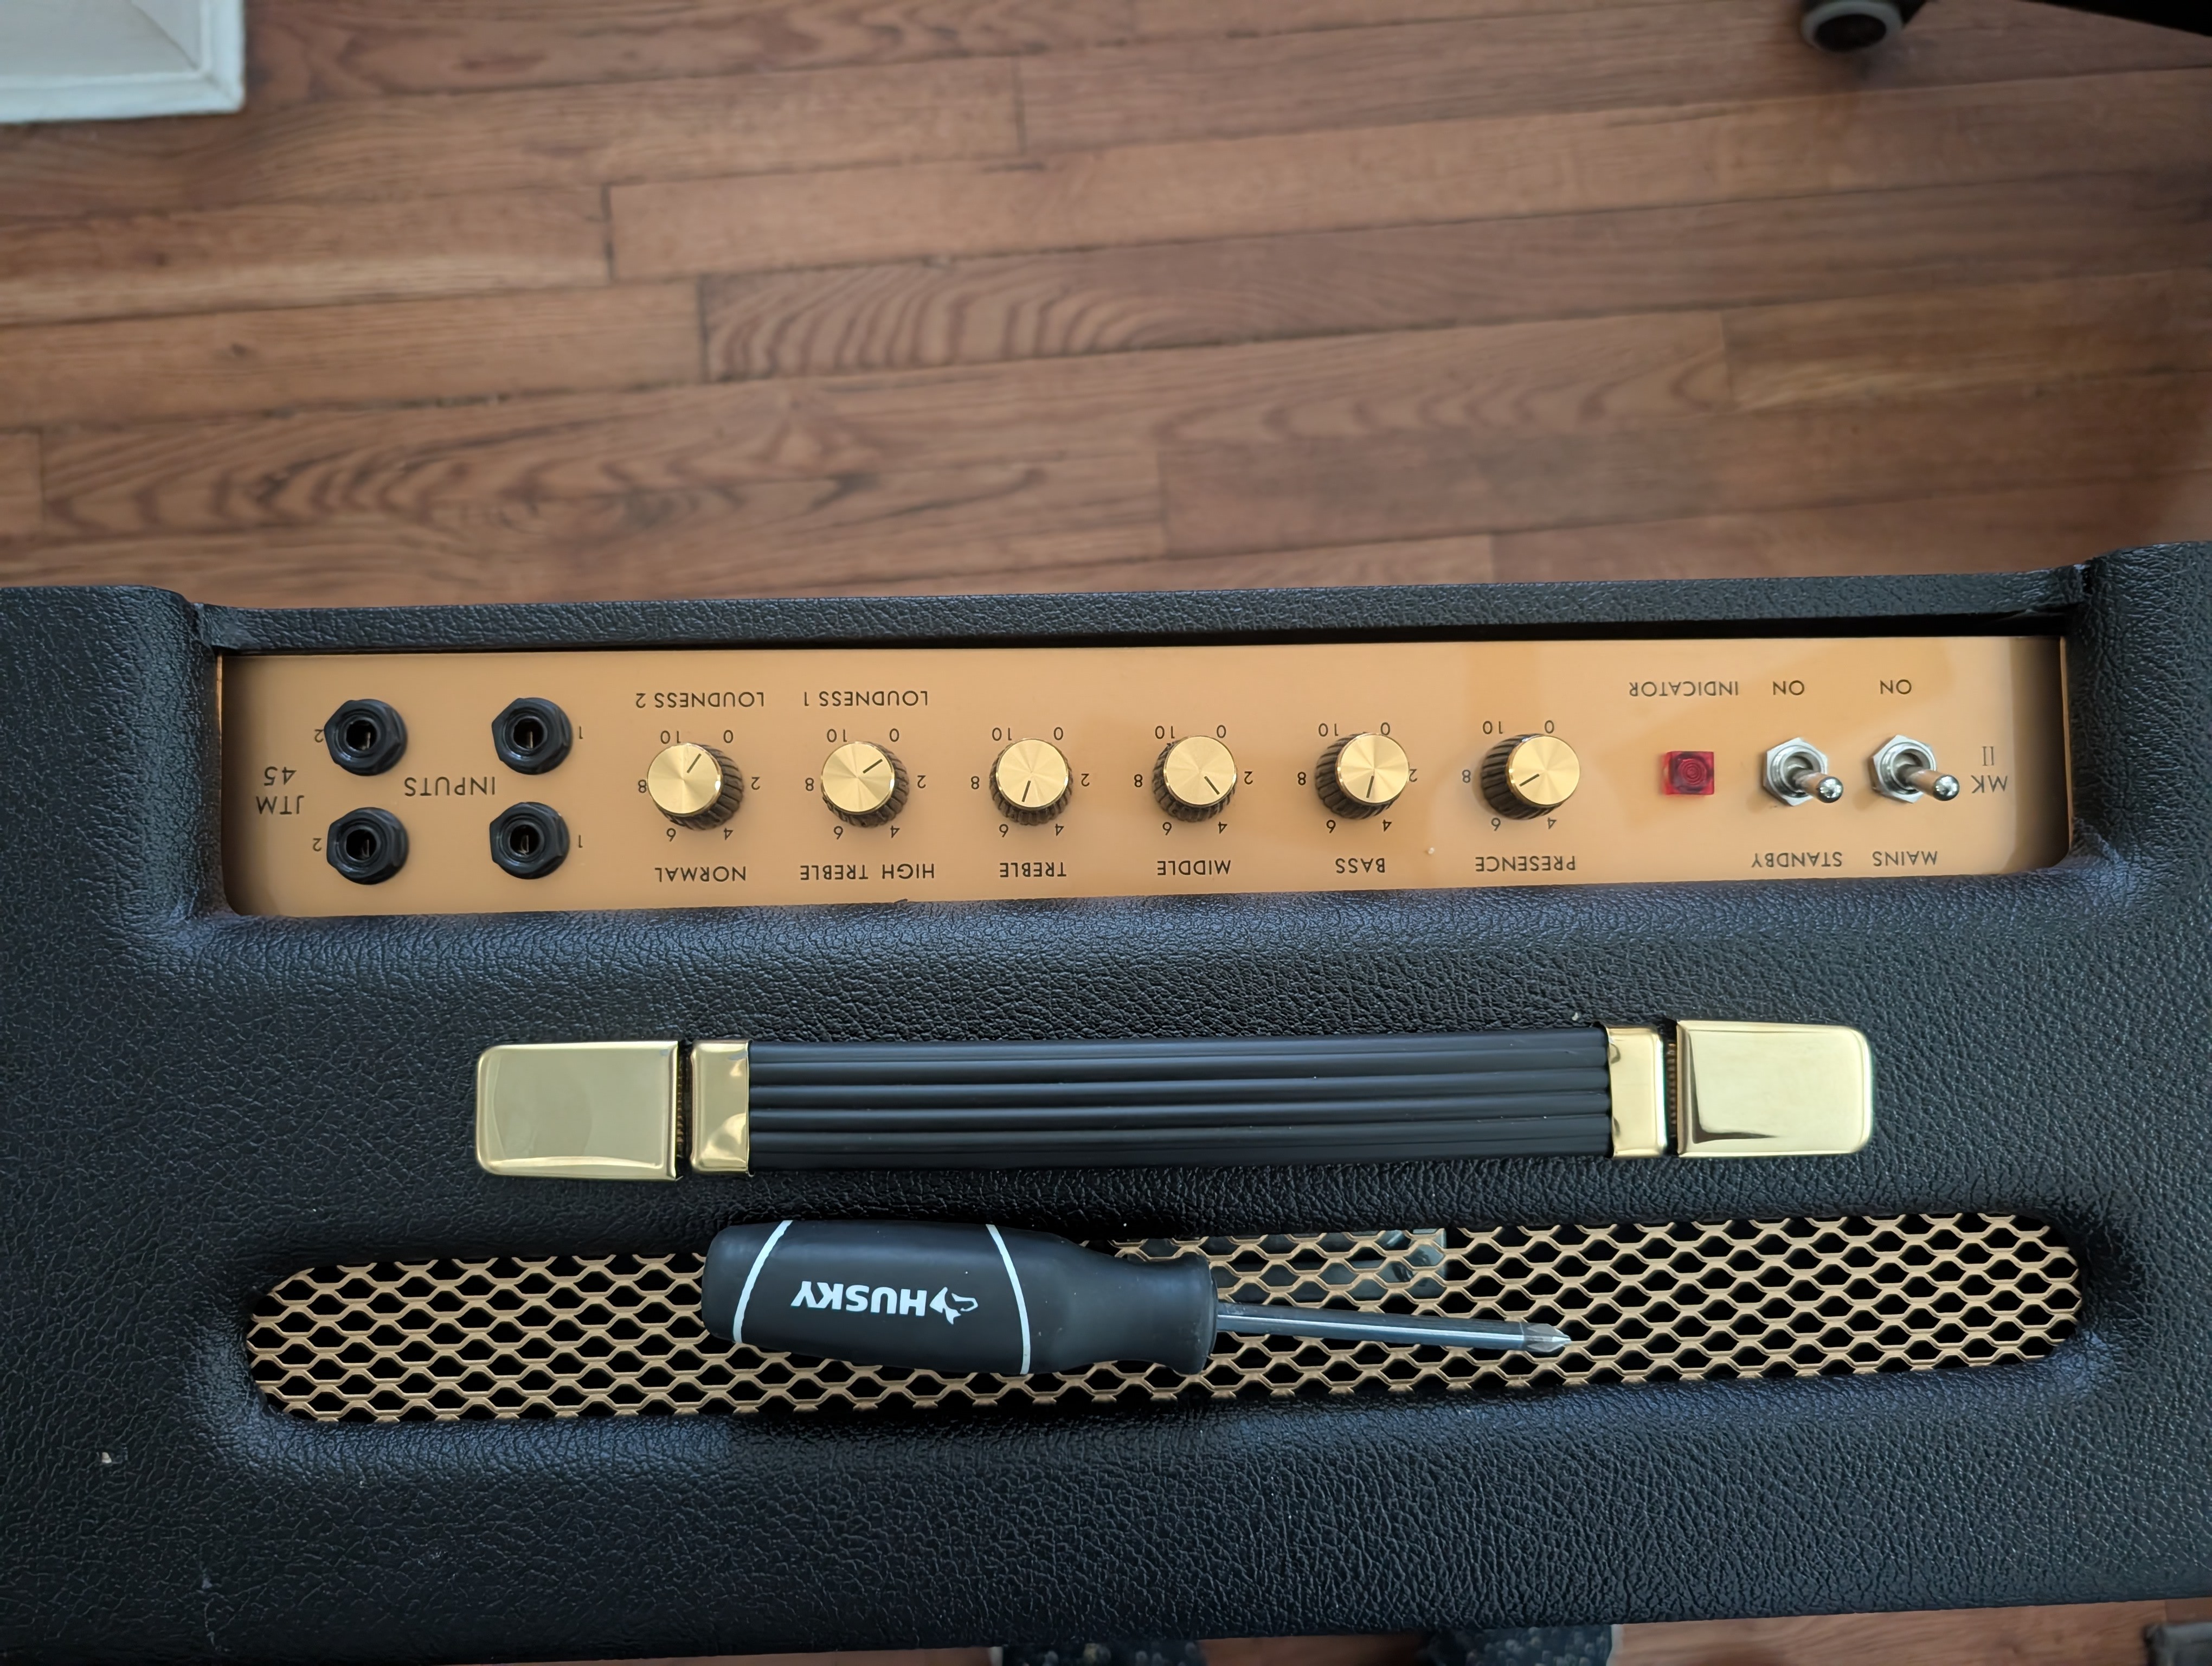
JTM45 Amplifier Build
- music tech
- electronics
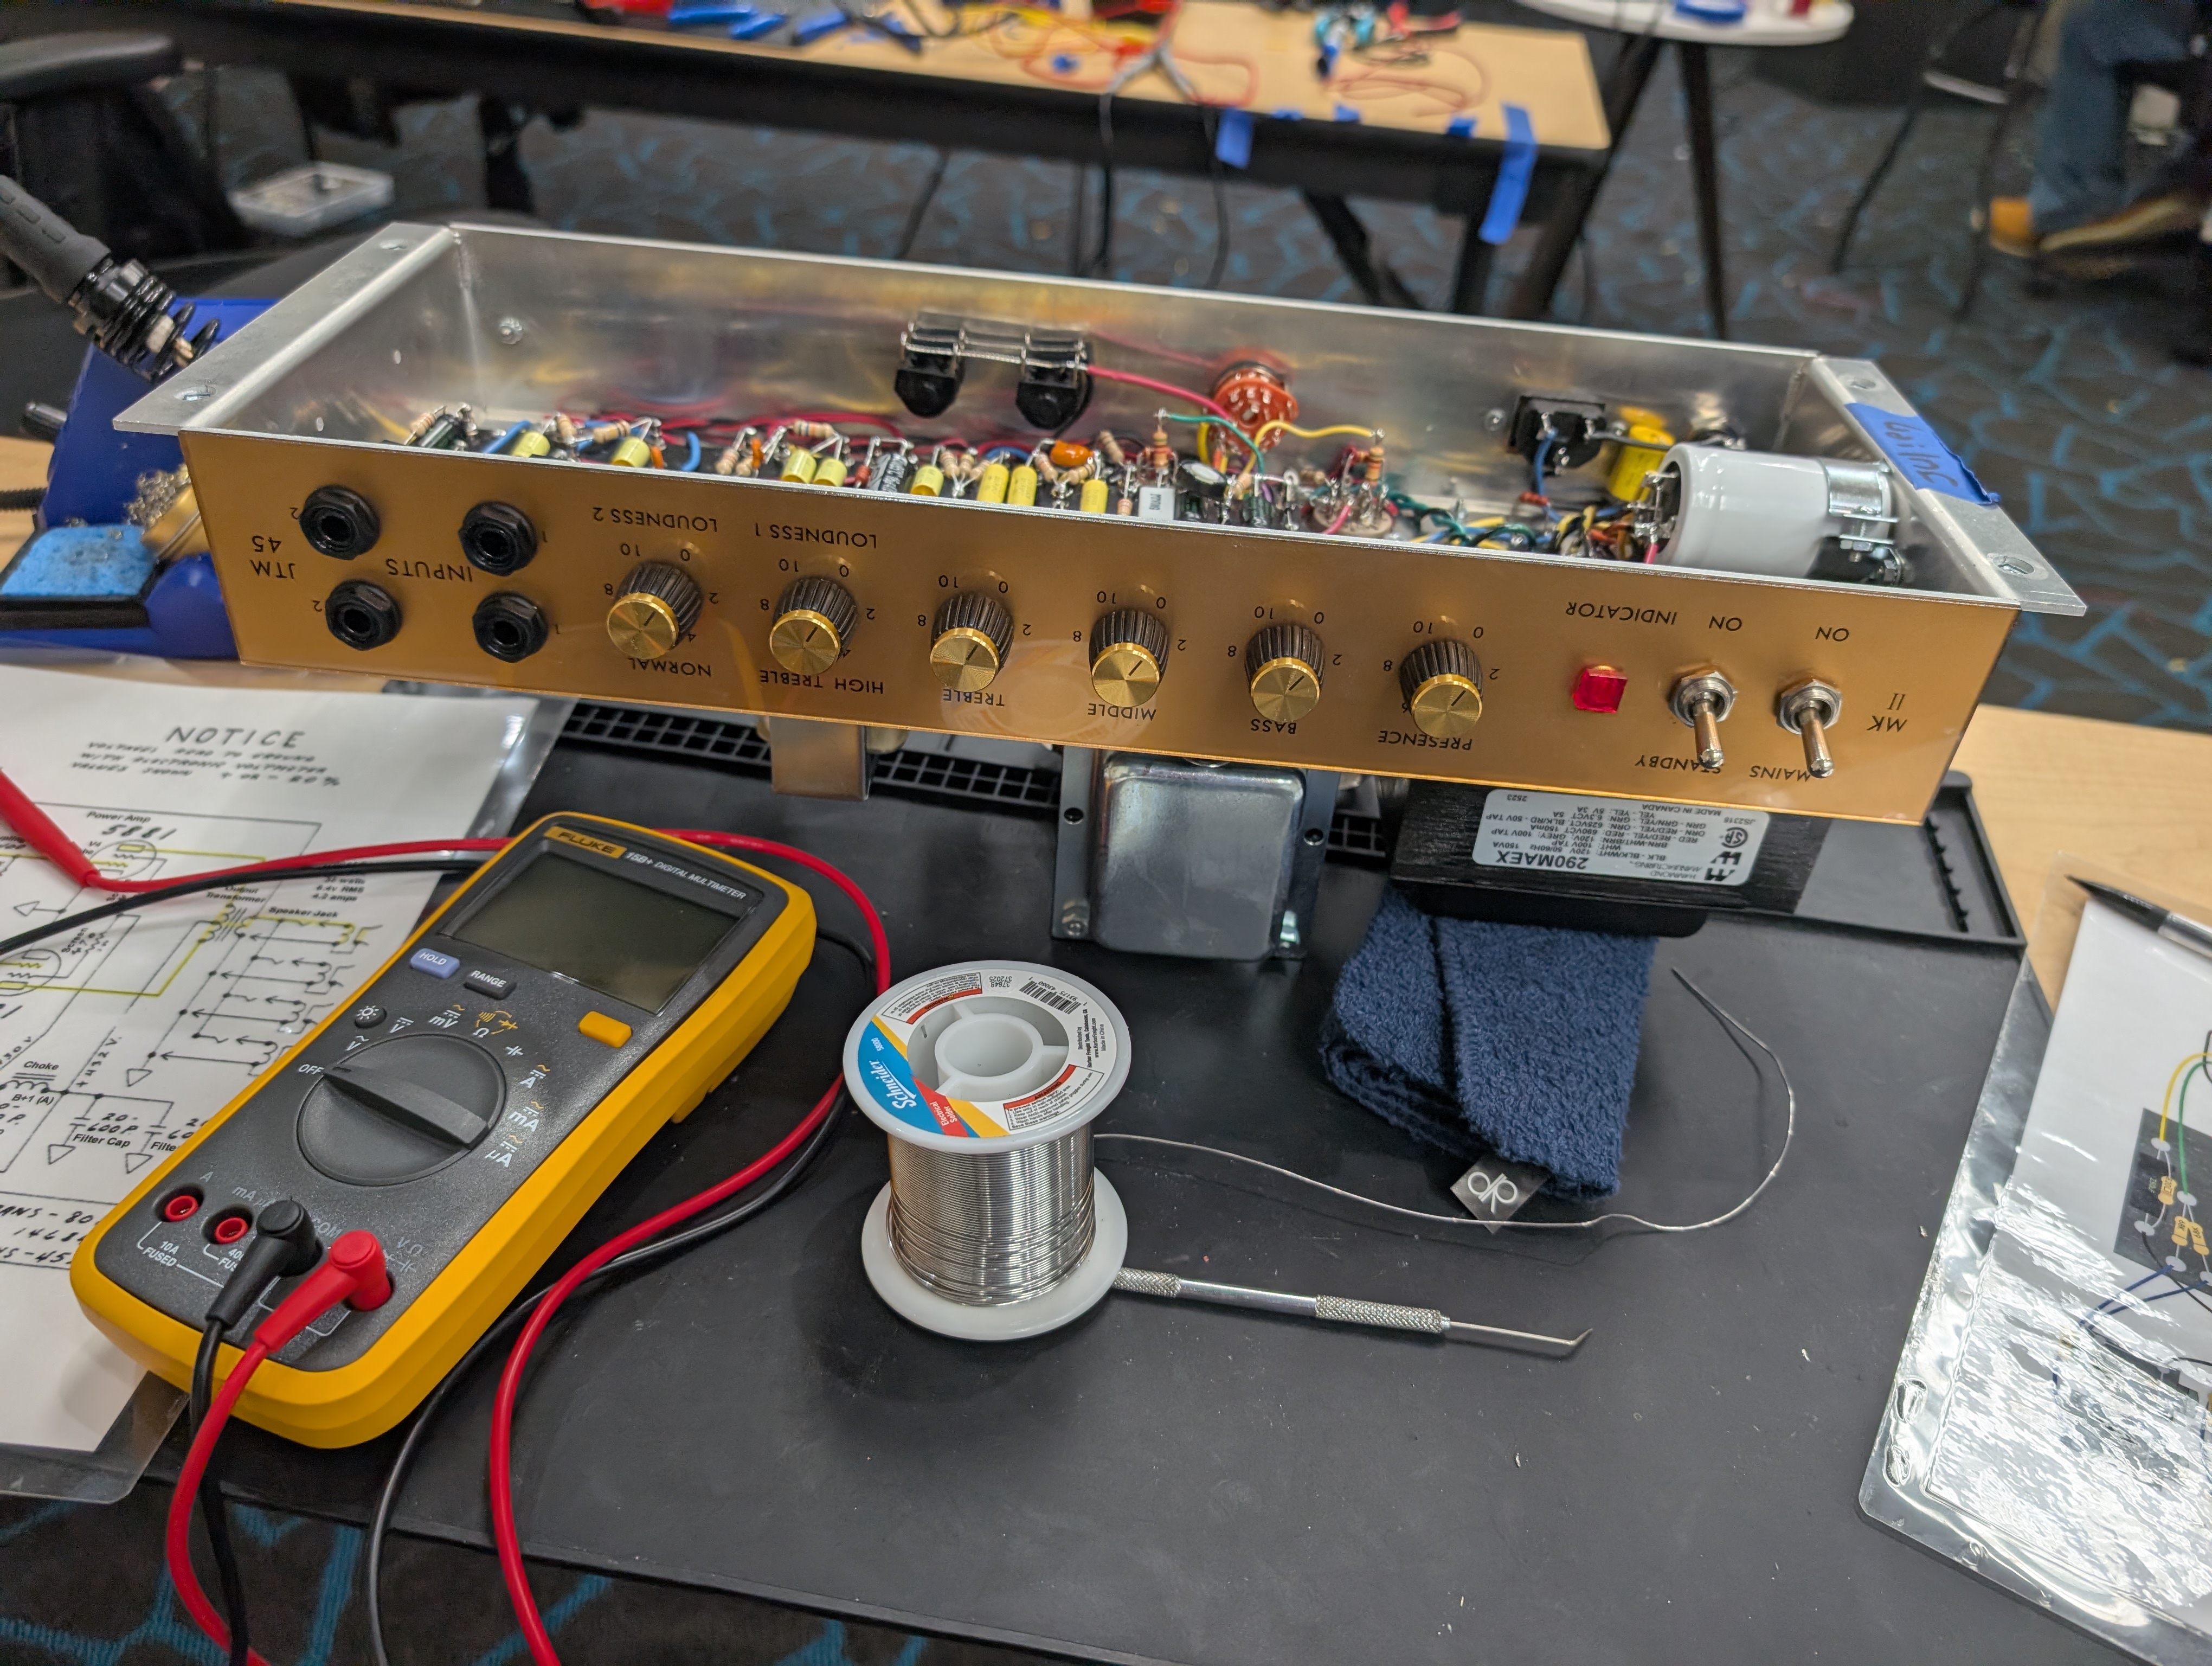
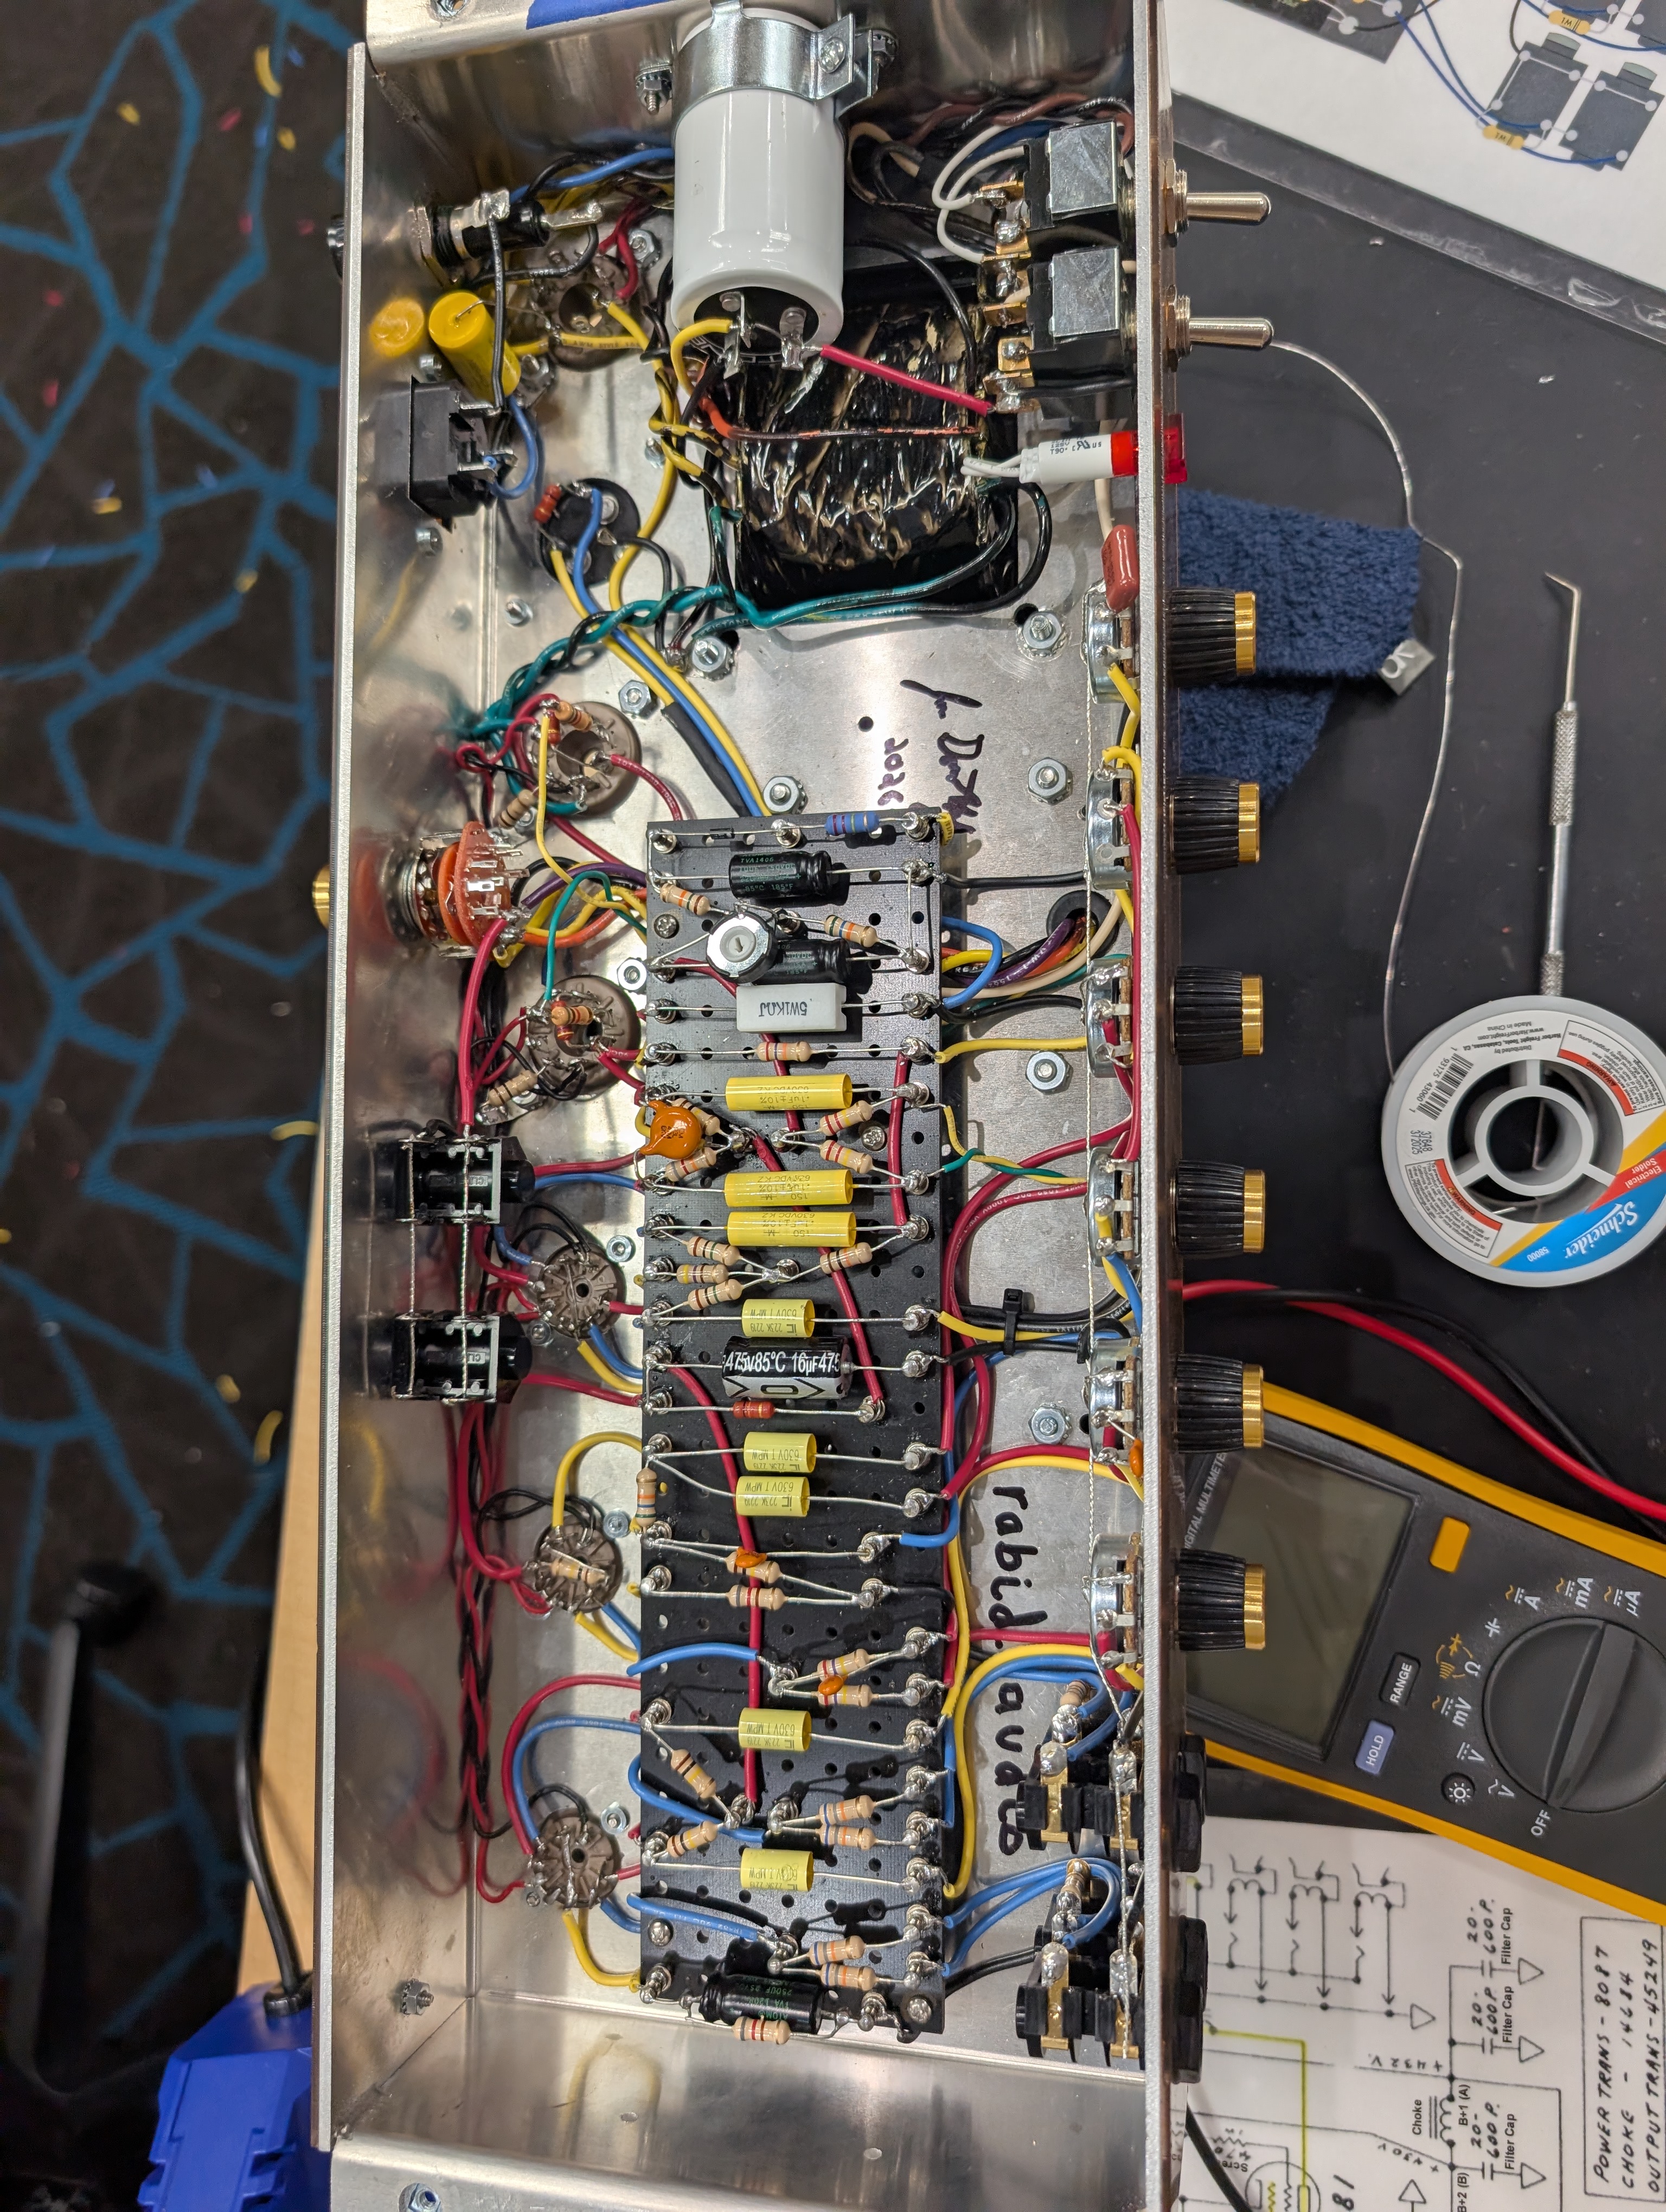
Over the weekend I joined an amp-building class run by Daniel Klein of Port City Amps. Over 3 days we put together a JTM45 kit. This is an early Marshall amp which was based heavily on a Fender Bassman. We were given some high-quality parts over-spec’d to get a really premium, low noise version of the amp.
Daniel gave us a crash course in tube amplifier design and general analog electronics. He got some of the EE theory wrong here and there but the practical intro to amplifier design was seriously invaluable. I’d never worked with tubes before and frankly was afraid of them but I discovered that the theory is overwhelmingly similar to transistor amplifiers.
I won’t go too much into detail about the design of the amplifier since it’s his secret sauce (you should take his class) and I’m going to link a different schematic that doesn’t have his annotations (which I also think happens to be easier to read).
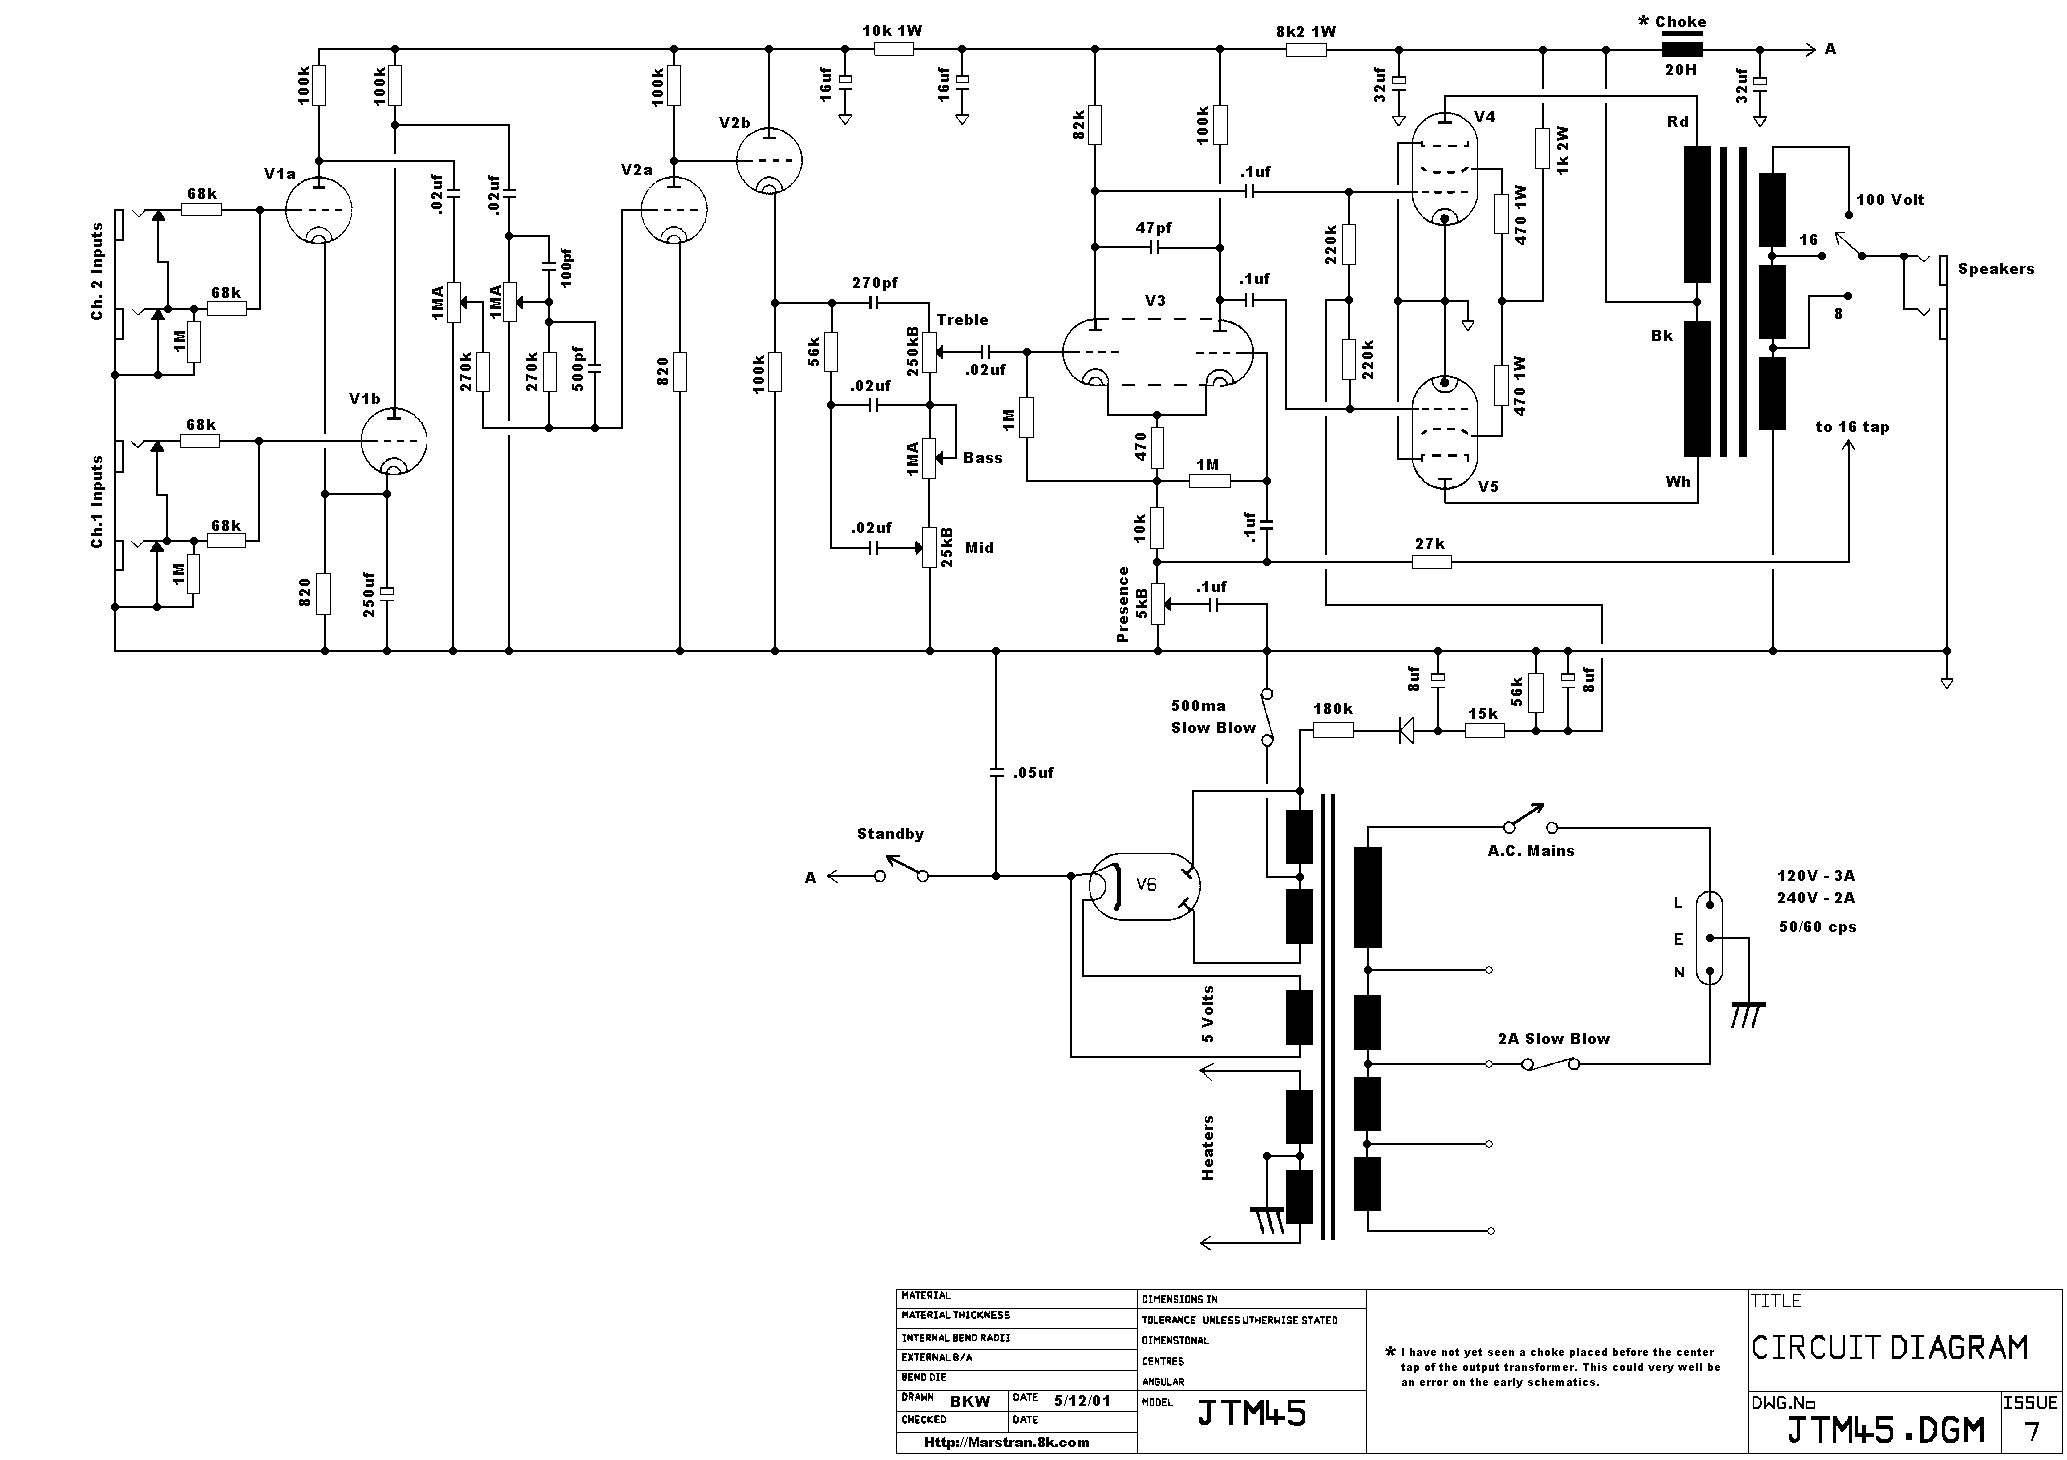
Here’s the high-level. There’s a 12AX7 (a dual tube) pre-amp buffer stage, with one side for the bright inputs and one for the normal inputs. The only difference between the two channels is the bright capacitor on the bright channel. They are mixed down into another 12AX7, the first stage being a voltage amplifier and the second being a common cathode amp, which just like a common-collector BJT amplifier has a voltage gain of 1 but a high current gain. This high current output allows it to drive a passive tone stage. From here it goes into one side of a differential amplifier implemented using a 12AX7 as a long-tail pair, making this a Class B push-pull design. Finally there’s the power amplifier stage, with two matched-pair EL34 tubes cranking out a high-voltage output. This is stepped down to a low-voltage, high-current output to drive low-impedance speakers using an output transformer.
I was surprised to learn how much of the heavy lifting is done by the power transformer. While I understand the theory of AC-DC converters, I’ve never actually built one. I’m generally scared of mains power, and since much of what I do is +/- 12V DC or less, I usually just buy a wall wort or use my bench power supply and avoid AC power all-together. But with tubes that’s not really an option. The tubes need plate voltages in the range of 200-400V DC, plus a low-voltage AC line for the heaters.
I asked about why in modern days we use an expensive, inefficient, and fragile tube rectifier (in this case a GZ34) instead of a $1 diode rectifier. The answer seems to be that people think it adds warmth. I’m a little skeptical how much the power supply line actually effects the guitar tone; this may be a case of gear-heads insisting that tubes are always superior. Mesa/Boogie makes a dual-rectifier amp with both types and a switch between the two. I’ve never tried it but supposedly there’s a subtle difference.
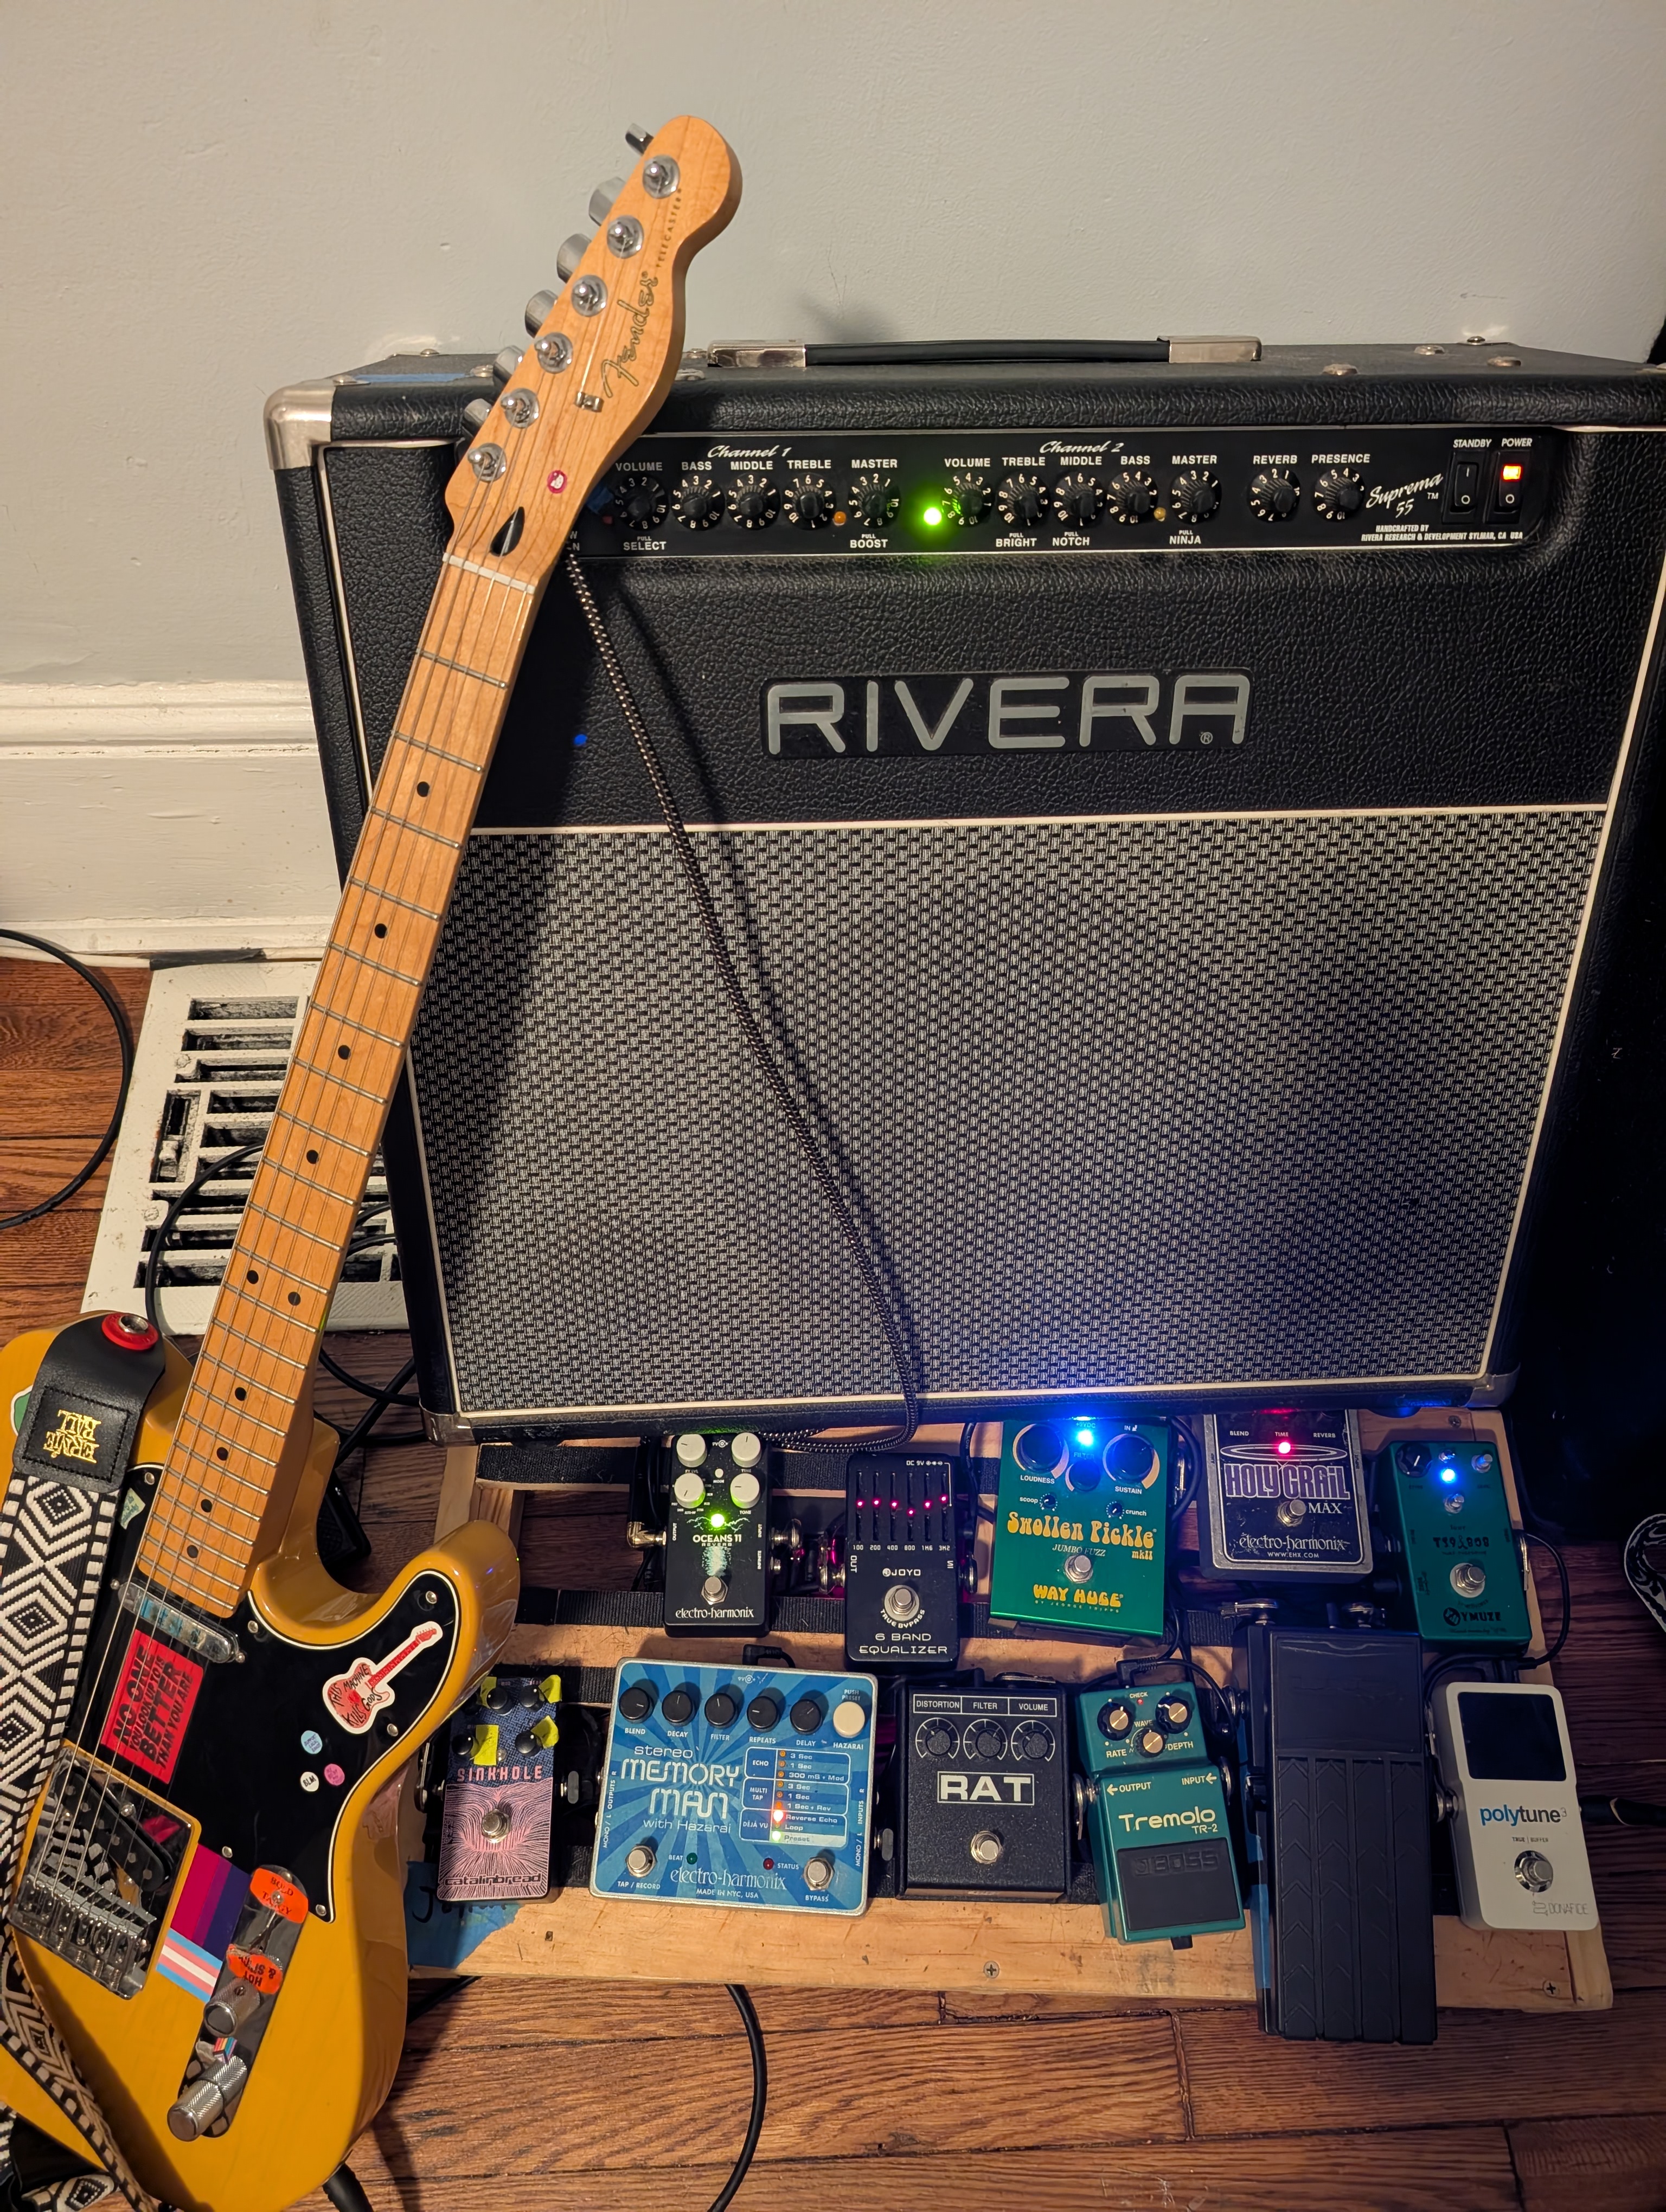
The amp sounds great. I’m more of a clean amp girlie; my gigging amp is a Rivera Suprema 55 which I keep on the clean channel, with both the bright boost and mid notch enabled. So I was interested in getting high-gain amp to kinda explore that world, and see if I could get some good heavier sounds for when I need a wall of sound with Serious Times.
Unfortunately the JTM45 is so loud. I’ve been keeping the volume around 1.2 out of 10, which has a lovely warm clean tone, but to get the real tone this amp is known for I gotta crank it to where I’m bothering the neighbors and have to put my earplugs in, making it harder to decern the tone.
Master Volume
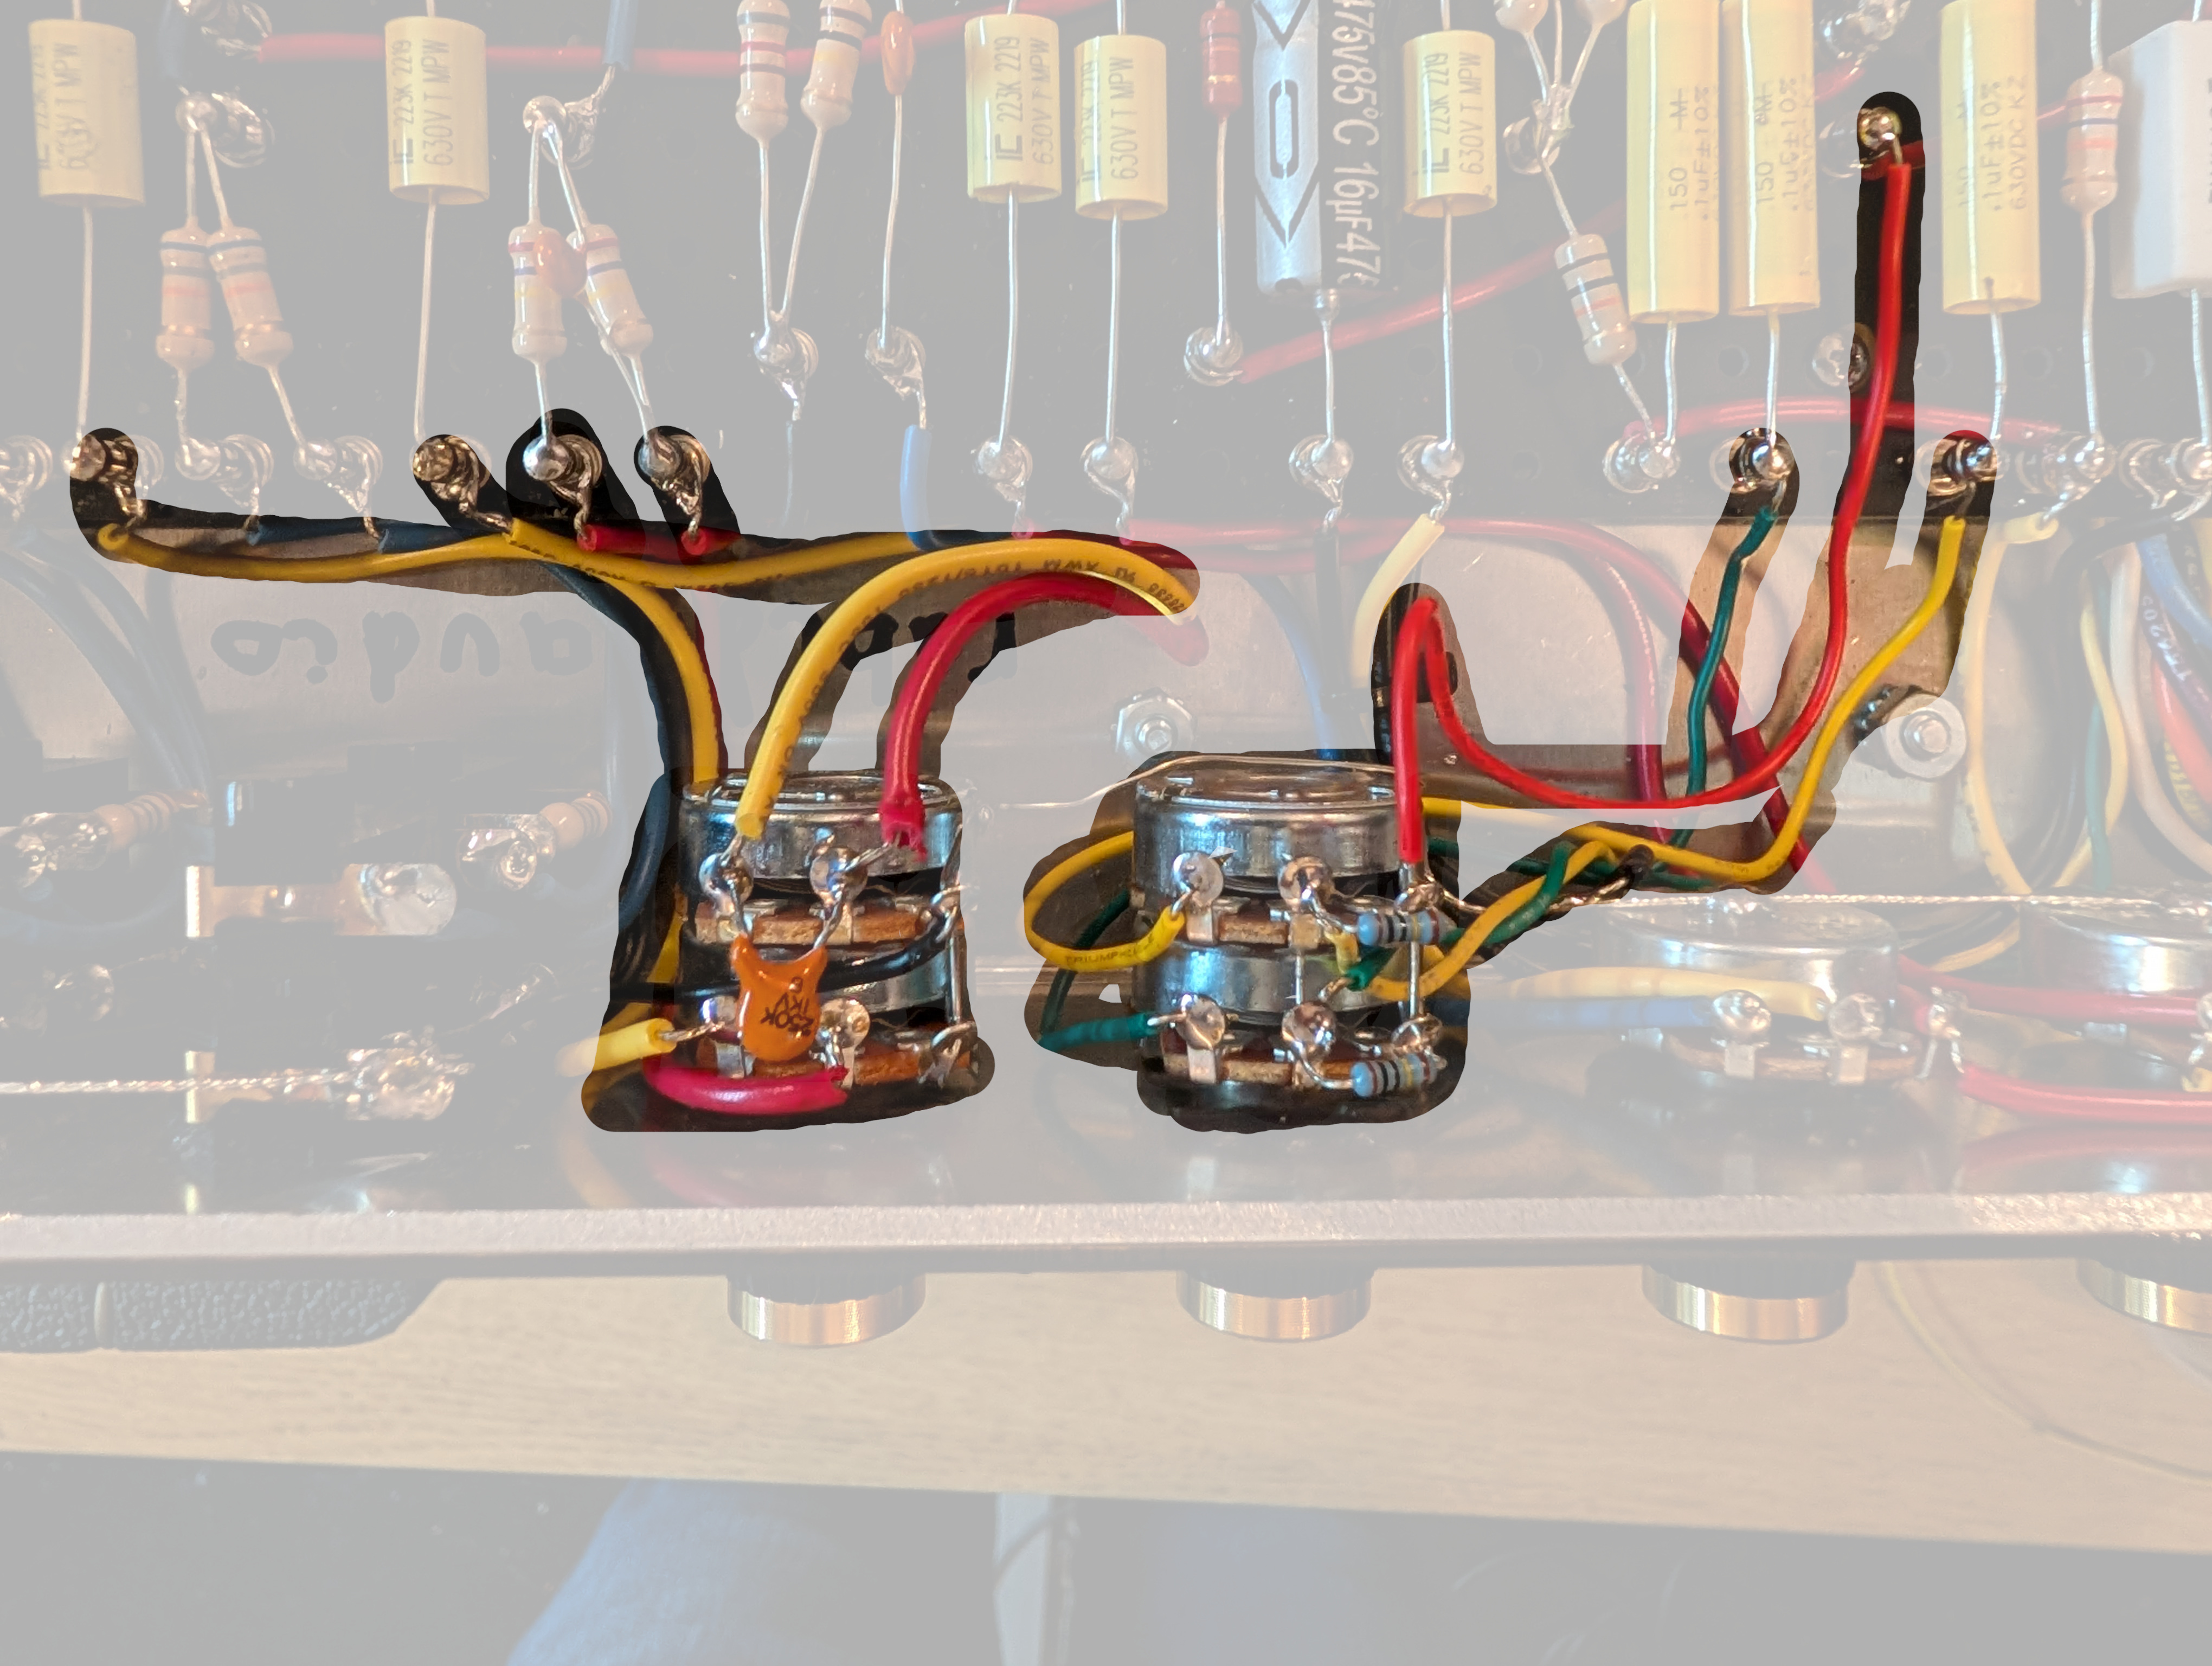
A very popular mod for this amp is to add a master volume. I would have naively done this either by putting a volume knob before or after the power stage, or by adding wire-wound resistors in series with the speaker. But the common (and much better approach) is to convert the 220Kohm grid leak resistors between the phase inverter and the power amps into pots. This keeps the gain and tone from the pre-amp stages, and at full volume behaves transparently.
In order to do this, I swapped the separate 1M audio taper volume pots into a stacked 1M audio taper, and used the other slot in the faceplate for the new master volume (a stacked 250K audio taper pot). This way the knobs become essentially “gain” and “volume” as found on more modern amps.

The output to the grids of the power transformers are on the center pin, and the signals in from the phase inverter are on the left if the knob is facing you. The -50V supply rail is on the right, and there are some 1Mohm resistors from the supply to the grids, likely for stability or grid leak when the pot goes to zero.
Load
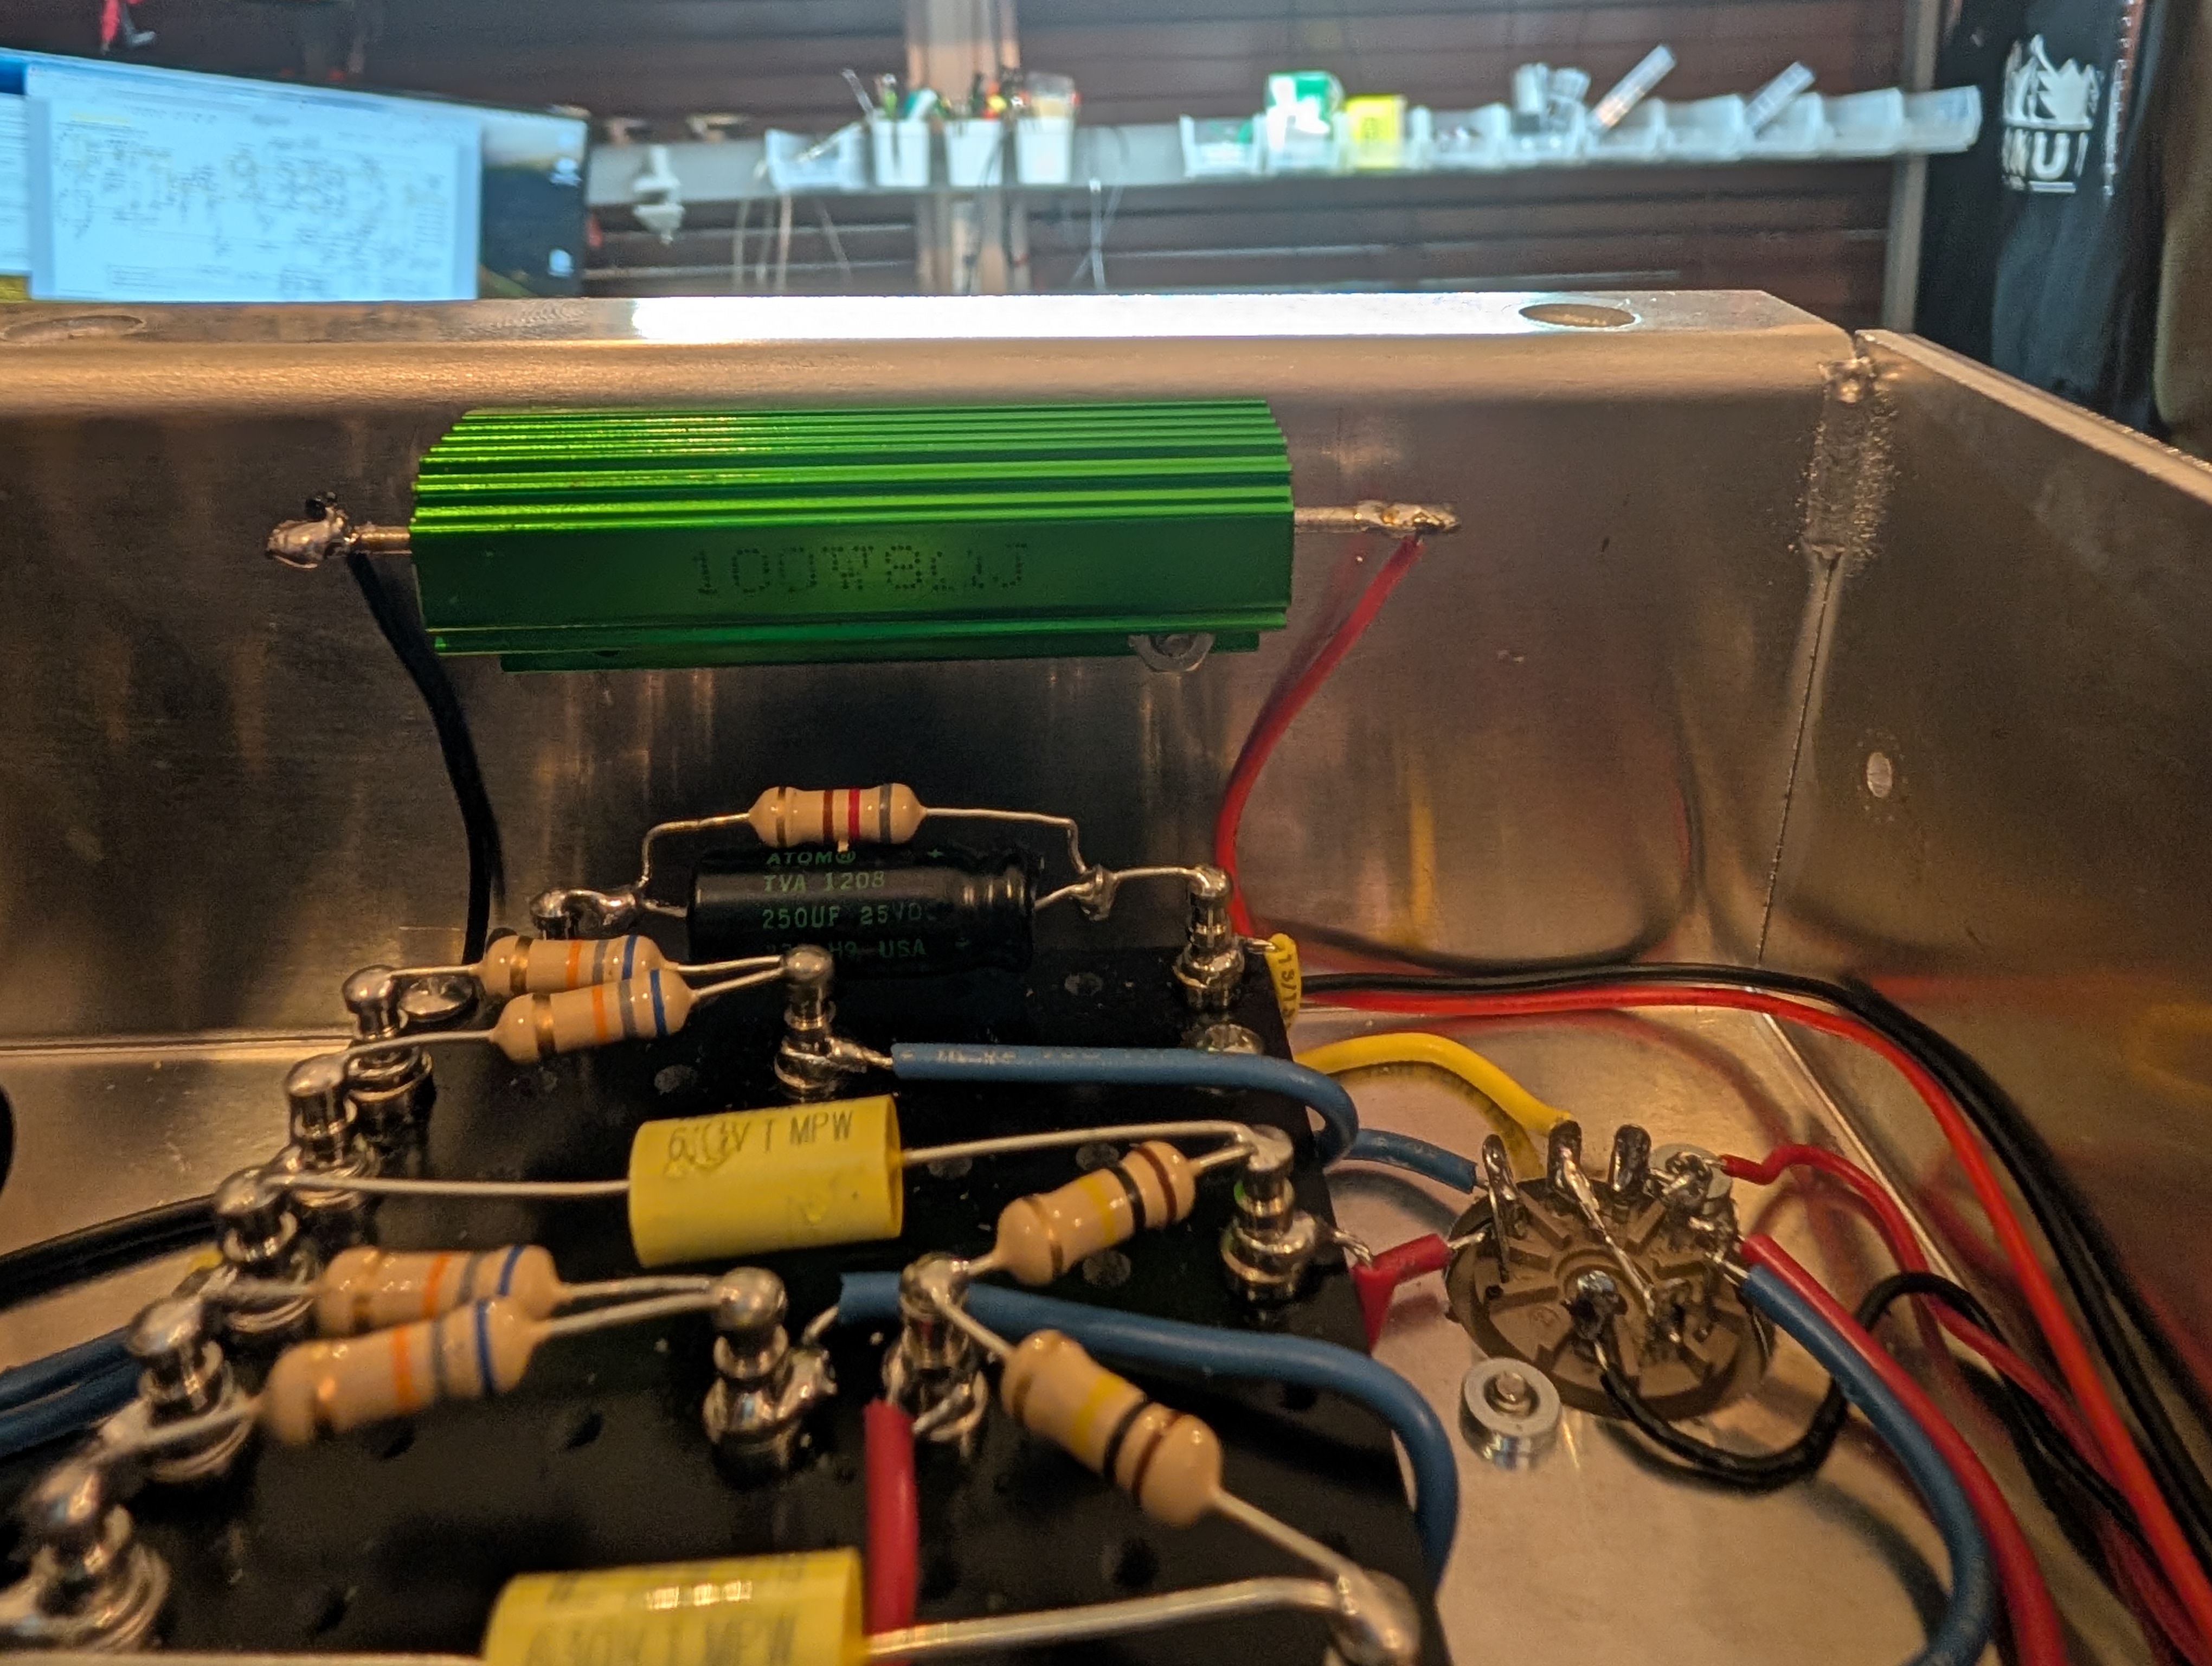
It’s really bad for the output transformer to run the amp without a load, but I’ve already once forgotten to plug the speaker in before powering it on. So I added a default load if the speaker is unplugged. I used the plug-detect on the output jacks to send the output through a big wire-wound resistor in case I forget. This is also useful for hacking on the amplifier, as I can power up the amplifier on the bench.
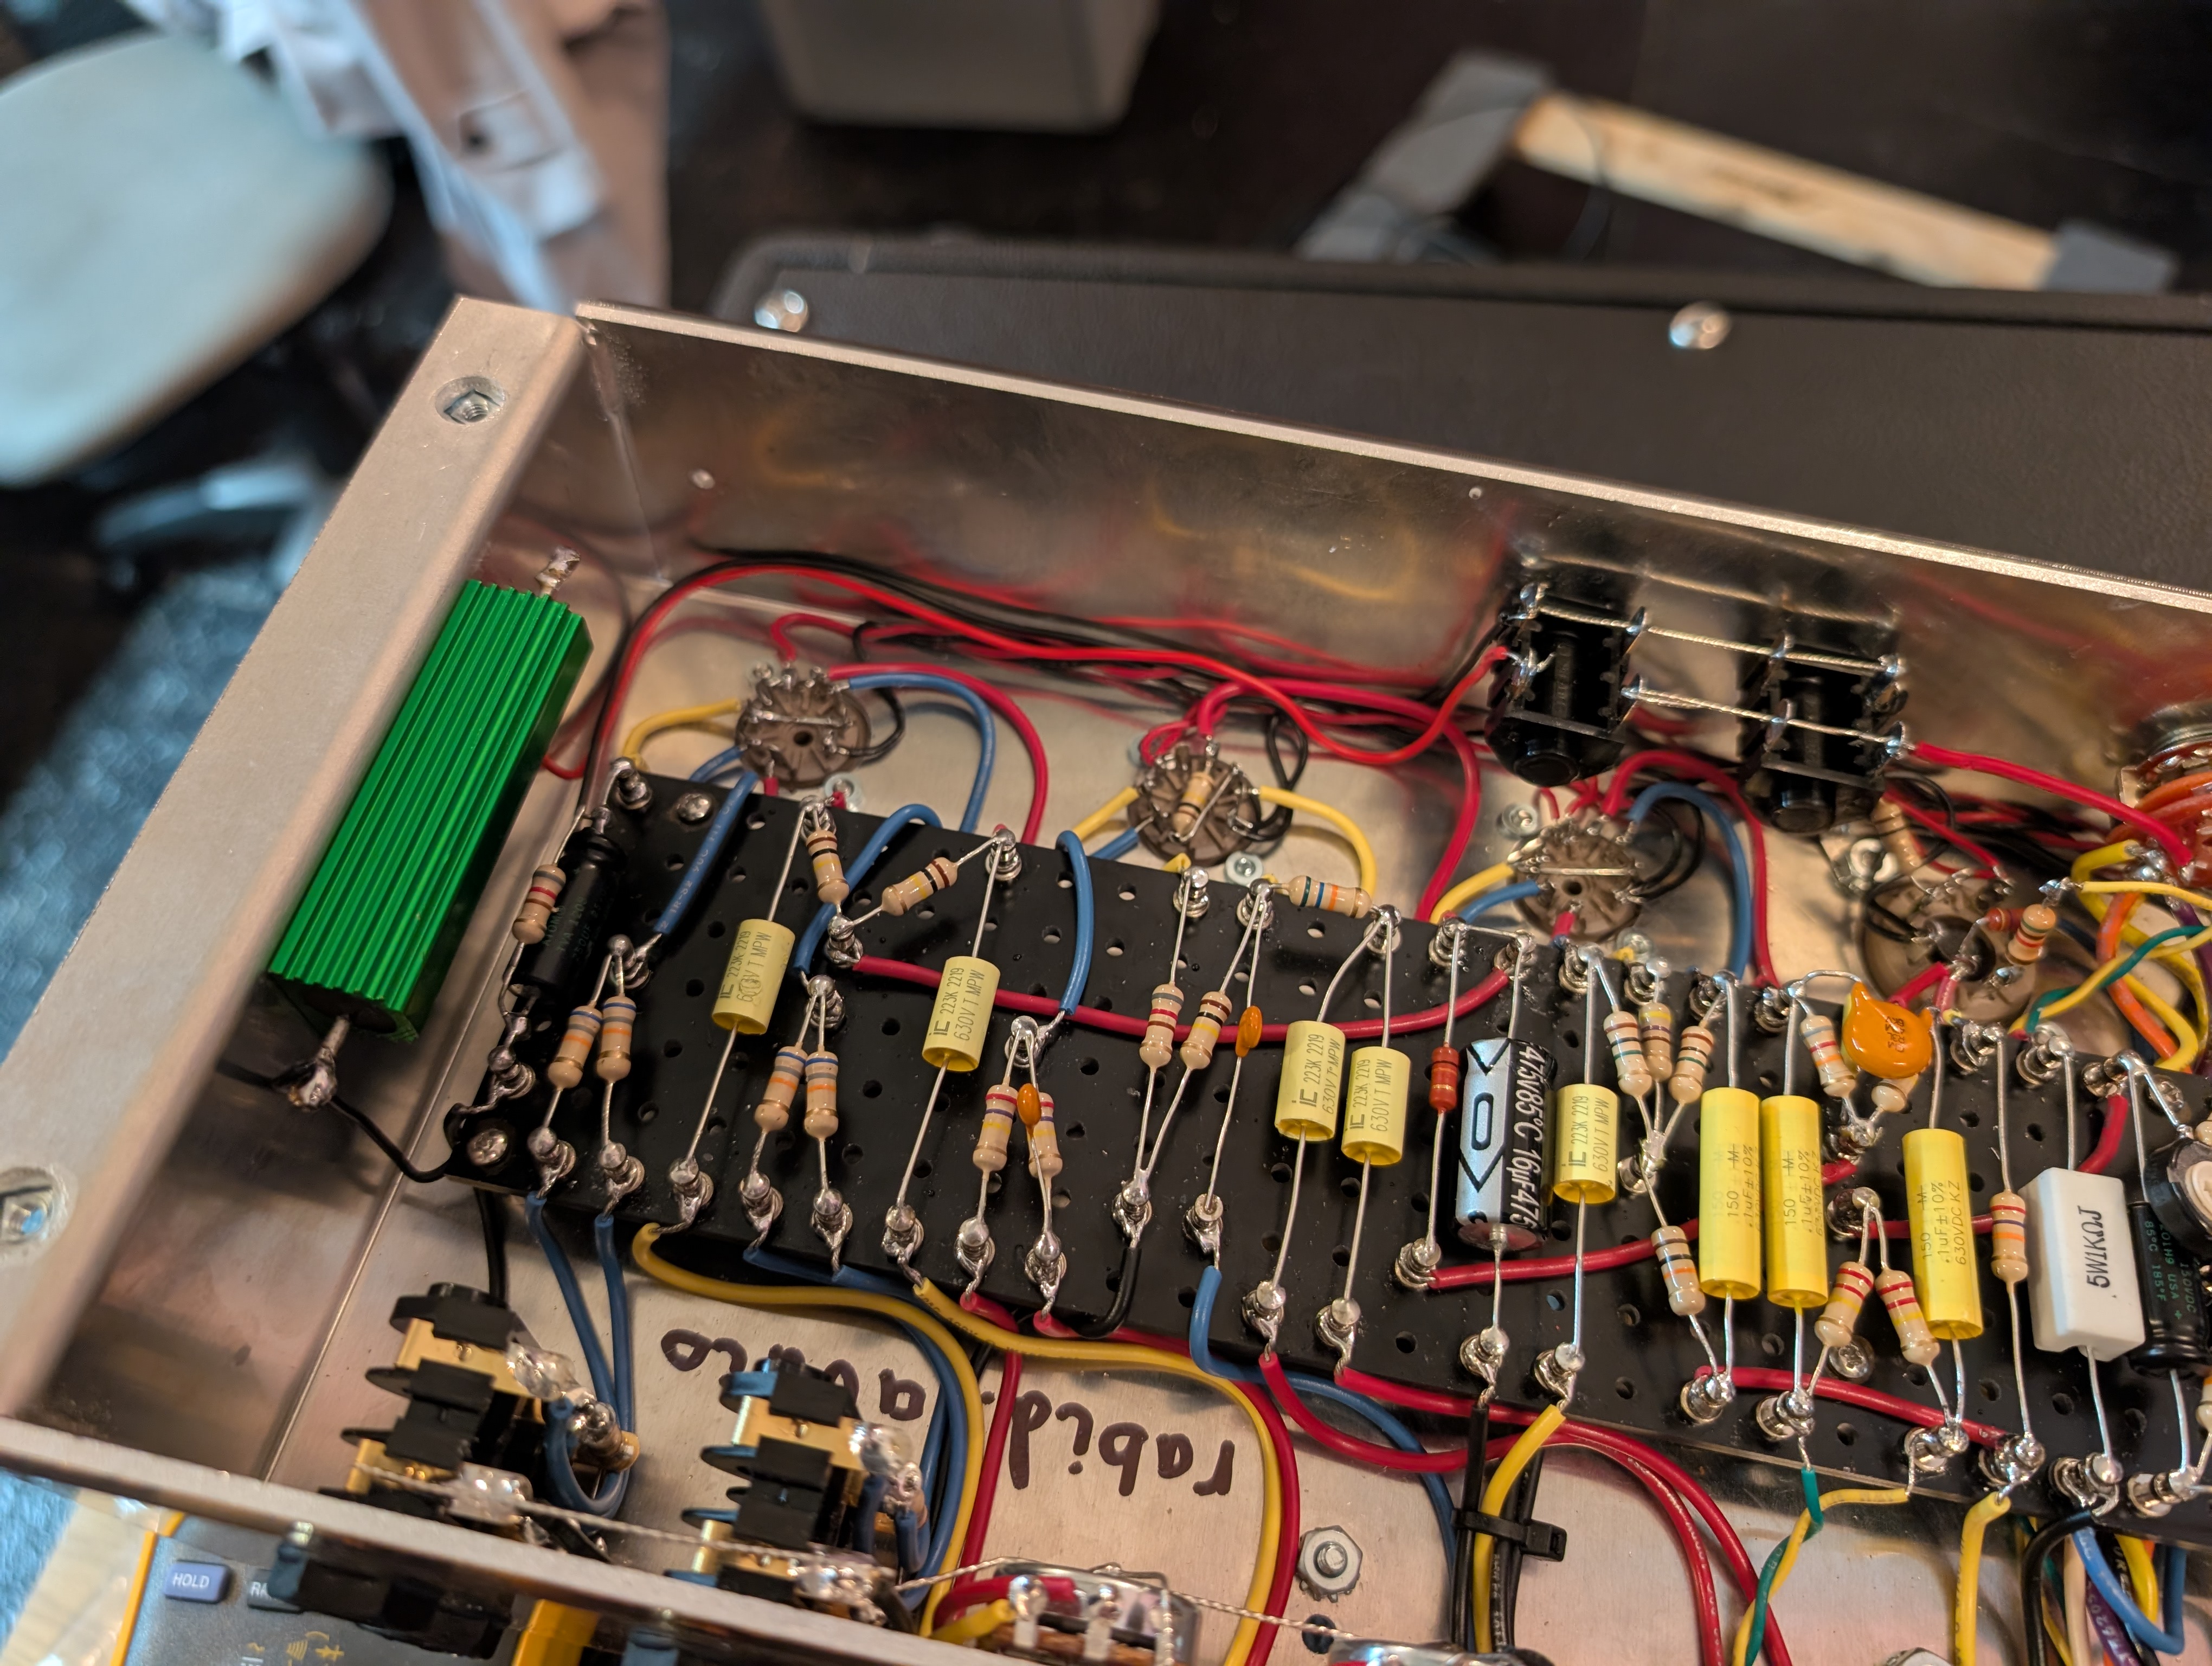
I screwed a 100W 8ohm wire-wound resistor to the side of the case, through some holes which were already drilled, probably for a can-cap.
Faceplate
The gold plexi faceplate is an iconic aesthetic of a Marshall amplifier. The text reads correctly when put into an amp head enclosure, but in a combo amp the text ends up reading towards the back of the amp instead of the front. Unfortunately, despite the large number of kits for this amp available online, and some discussion in forums of some folks making custom one-offs, no one seems to sell a flipped version of the panel.
This, combined with the fact that my mods are going to change the behavior of some of the pots, makes me think this is as good a time as any to get the laser cutter in the makerspace up and running and make my own panel. I ordered some acrylic. I’ve laser etched text in acrylic before but I wasn’t sure how printed text is done. I watched this video and it turns out it’s incredibly straightforward. Basically you etch with the protective sticker film still on, apply a layer of lacquer, and then use a paint pen to fill in the etch. Hopefully I can try this out soon.
Other Mods
I’ve got a list of more mods I want to do. One is significant enough to merit it’s own post, but I’ve already ordered the parts for it, so expect an update soon.
Here are some of the smaller mods I’ve been considering:
- A switch for a solid-state rectifier. This is useful in case the rectifier tube blows; I could switch to a solid-state one and still play a show. It would also allow me to test how important the tube rectifier is to the tone as discussed above.
- Effects send/return. This one isn’t super high priority since I’ve never bothered to actually use one. Rather than add more tubes for buffers I’d probably just add a TLO72. I might be able to drive them from an AC-DC converter off the heater line. This would probably be below the minimum power supply requirements for the opamp from the datasheet but I’ve run the TL072 off a 9V battery before without issue so it would probably work. Definitely a lower-priority mod; I lot of work for little return.
- A switch to invert the phase, in case you’re using two amps and they are out of phase