Partscaster Build Part III - Finished
- music tech
Time to put the final touches on the guitar, let’s jump right in!
Headstock
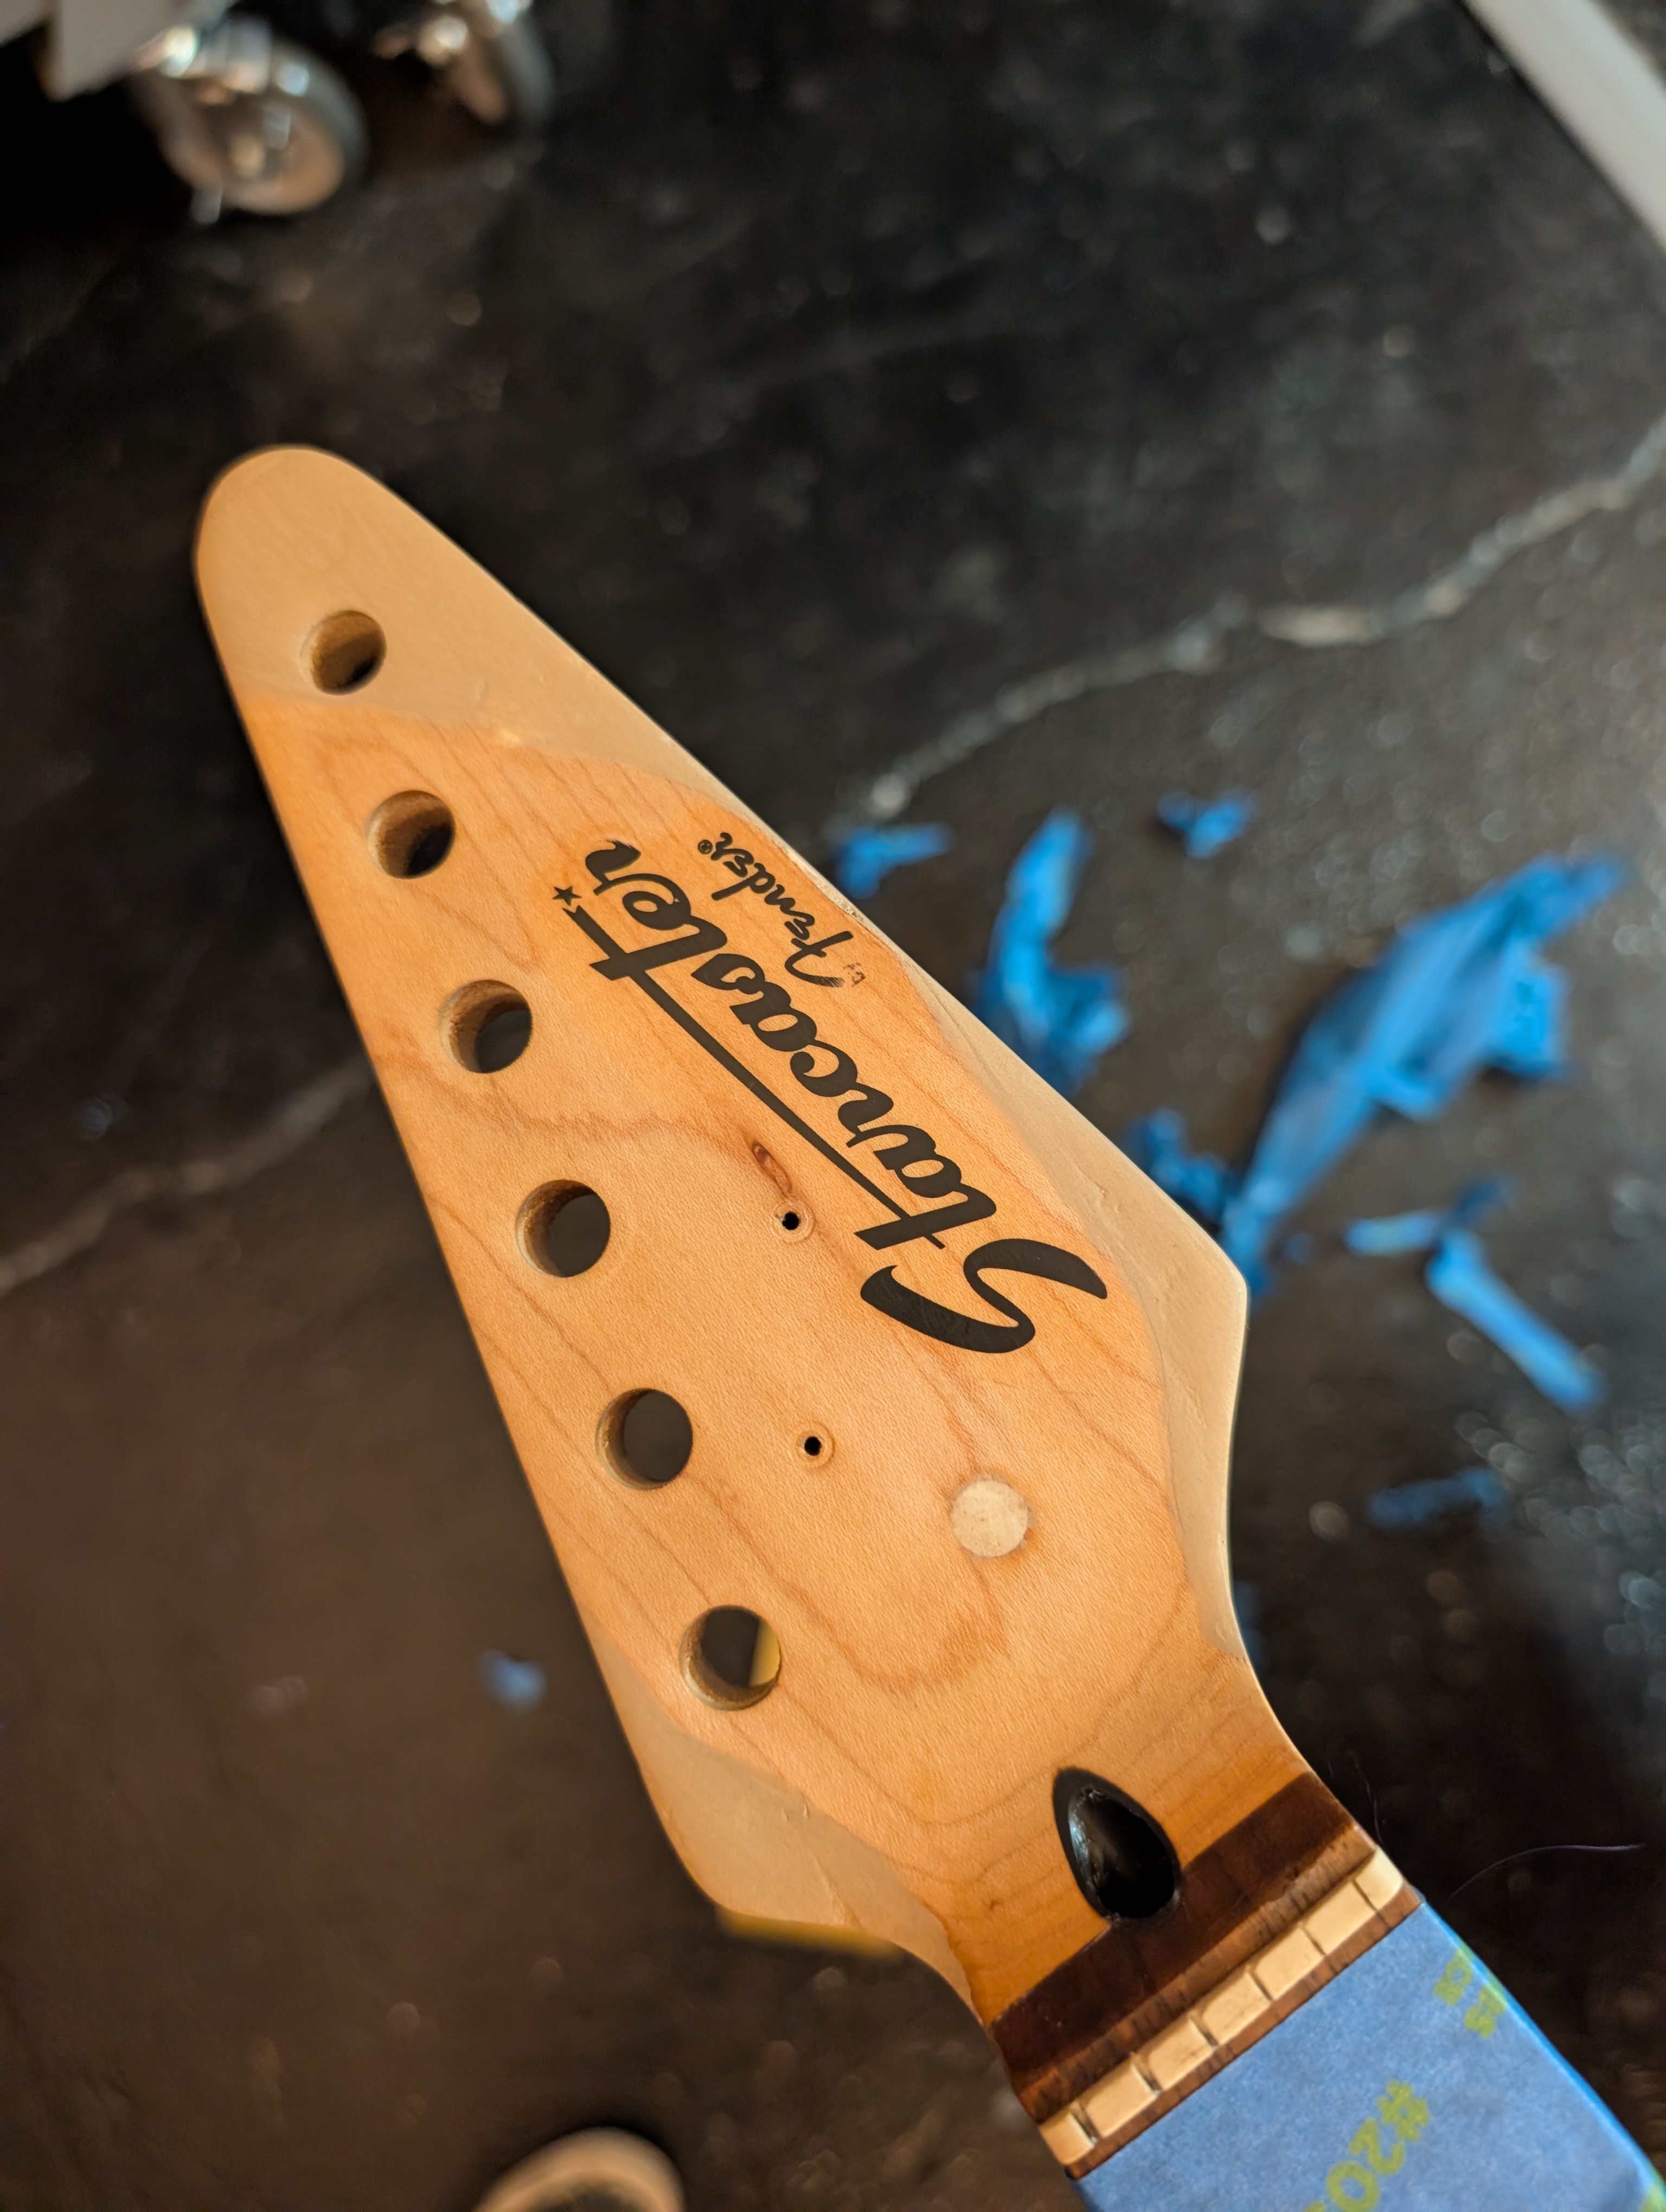
I had the idea to sand down the WoodEpox, and add another thin layer of it on top mixed with the sawdust I’d saved to try and color match the wood. This did not go well. The color didn’t match at all and I ended up making the shape worse and adding a lot of cracks and gaps.
I had heard about this product Retique It which is like a paint you can apply to any surface and it will stain because it has wood fibers in it. So I tried painting that over the molded sections. The color wasn’t right but it was less obviously wrong, so I painted an intentional-looking shape over the bad areas. It’s kind of a nasty brown but I’m thinking of painting over it with some sort of design, perhaps crashing waves or flowers or something.
For the finish, I followed Brad Angove’s technique, using a rub-on polyurethane finish. I sanded with 400 grit, then applied two coats using 1500 grit sandpaper, with 30-40m between. Then I did two more coats with a microfiber cloth, with a couple hours drying between. The end result is not quite as dark as the original (maybe more coats would have done it or maybe they are just different tints), but good enough for me.
Bridge
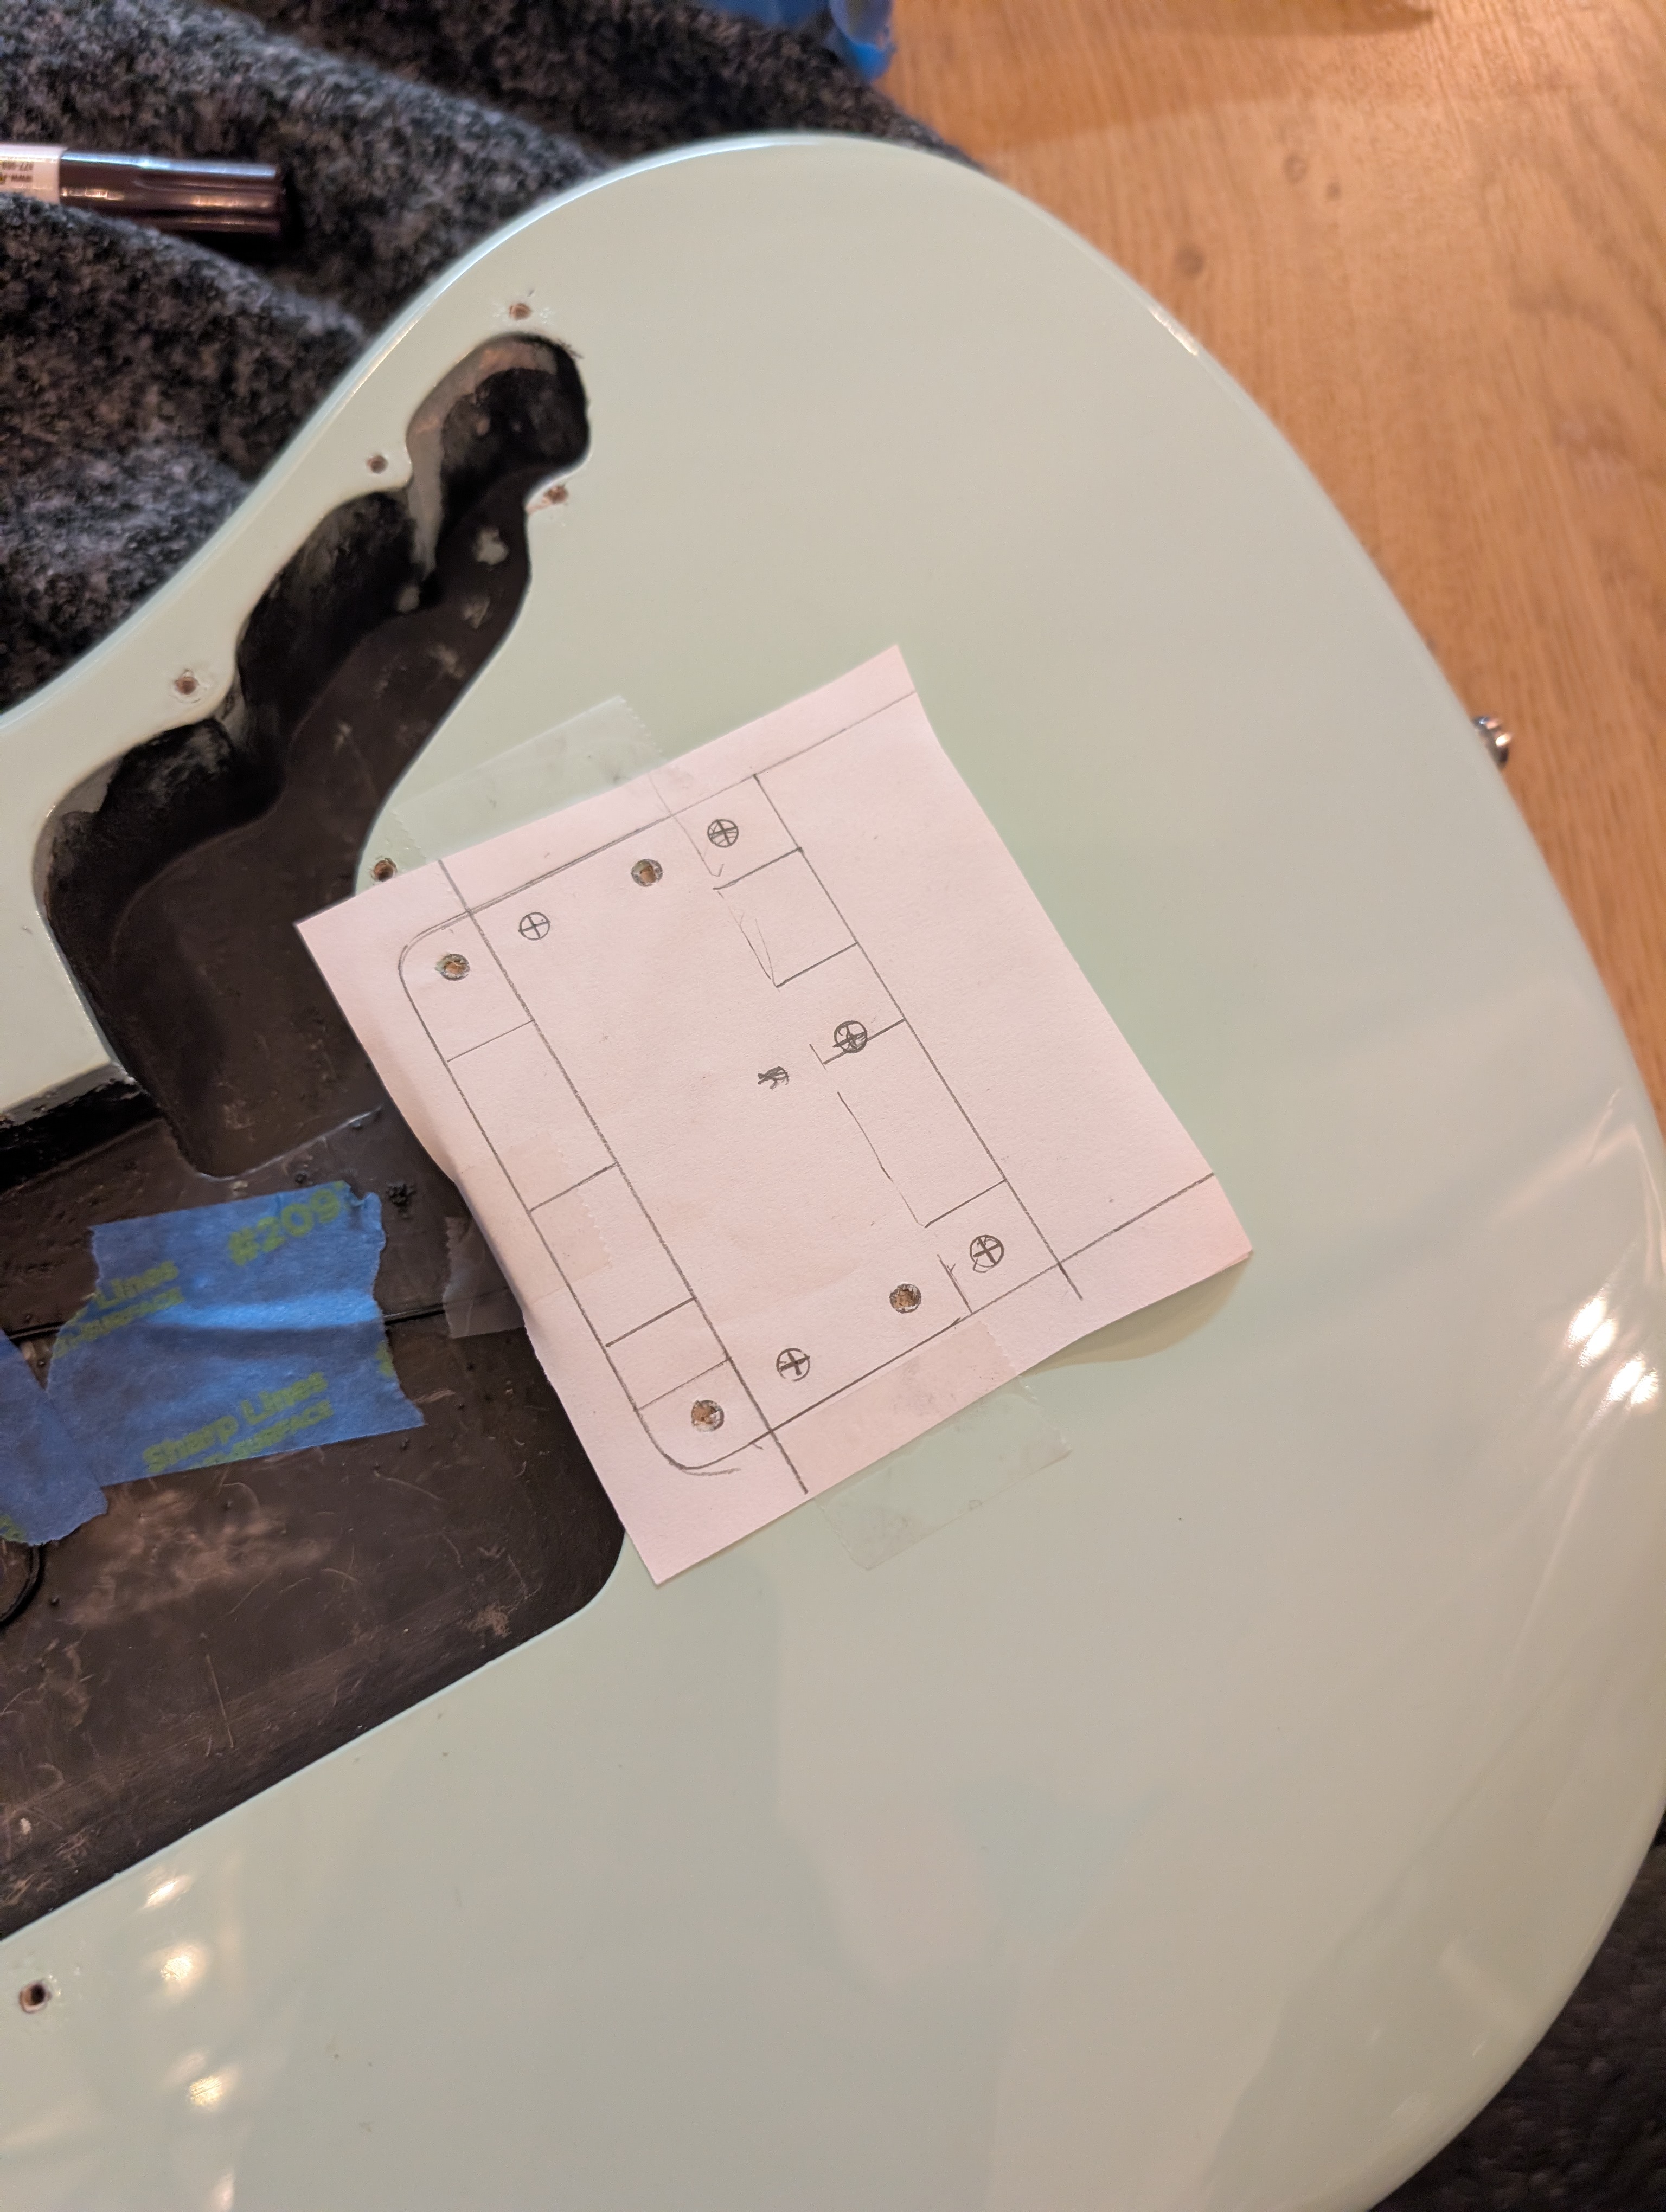
I shopped my custom bridge plate design around to a couple of online metal fabrication sites. Unfortunately manufacturing a bridge would cost $200-$400. I decided just moving the bridge was a much better plan. I re-designed the pickguard again to ensure it would cover the original holes. Added some wood filler into the holes, and very carefully measured and drilled using some traced paper as a guide.
Fret leveling
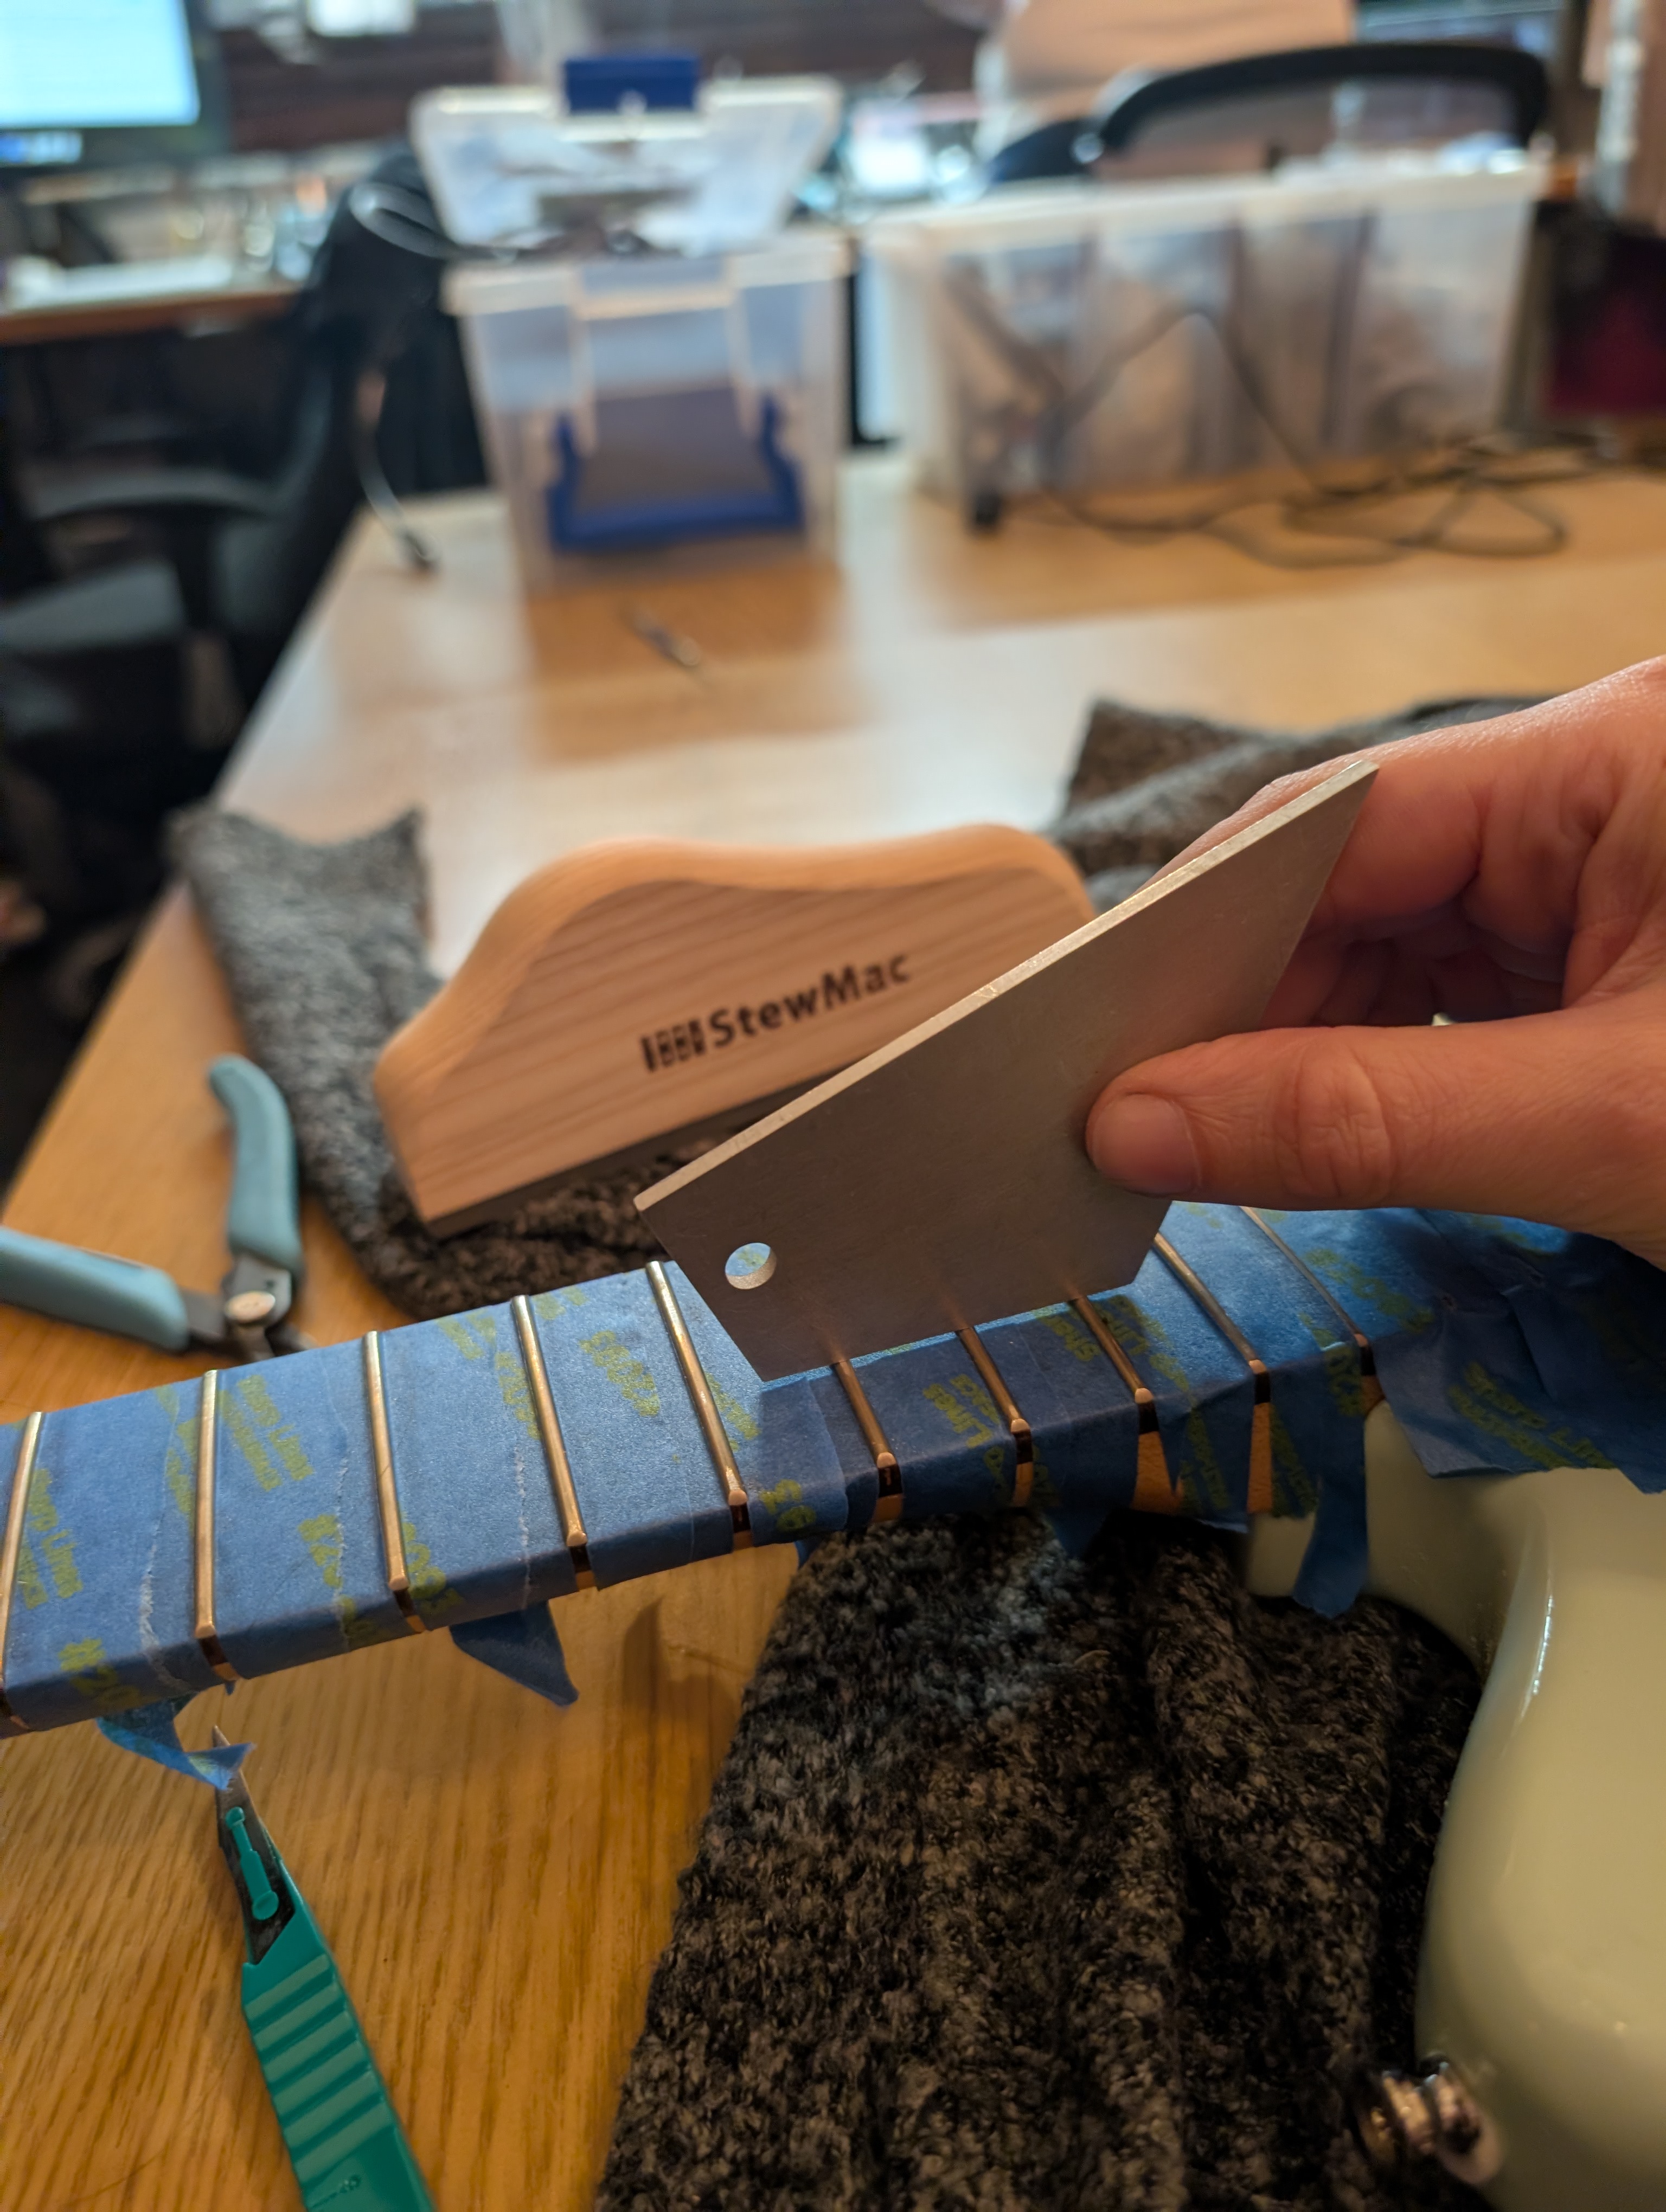
I’ve always been a little terrified at the prospect of fret leveling, but it wasn’t that bad. Taping off the fingerboard took ages, but it’s worth it to avoid metal shavings in your fingerboard. I used the fret rocker to find problem areas, and then did only one or two pushes with the file, checking with the rocker again. I probably could have used a hand file to improve the shape after but since not that much material came off I decided it wasn’t necessary.
Pickguard
Because of the bridge I had to run one more pickguard, which I prototyped in cardboard first. No issues with the cut.
I’d ordered a vinyl decal (and a second as backup) from StickerYou for reverse windows, so that the sticky side was the image side, in a custom size (11.7” x 14.6”) so that it would align with my desired pickguard layout. My plan had been to stick the sticker to the PET and then cut both with the laser cutter at the same time. However a warning message with the laser printer taught me that you can’t cut vinyl in a laser cutter; it creates chlorine gas. In addition to being toxic it also is corrosive to the printer.
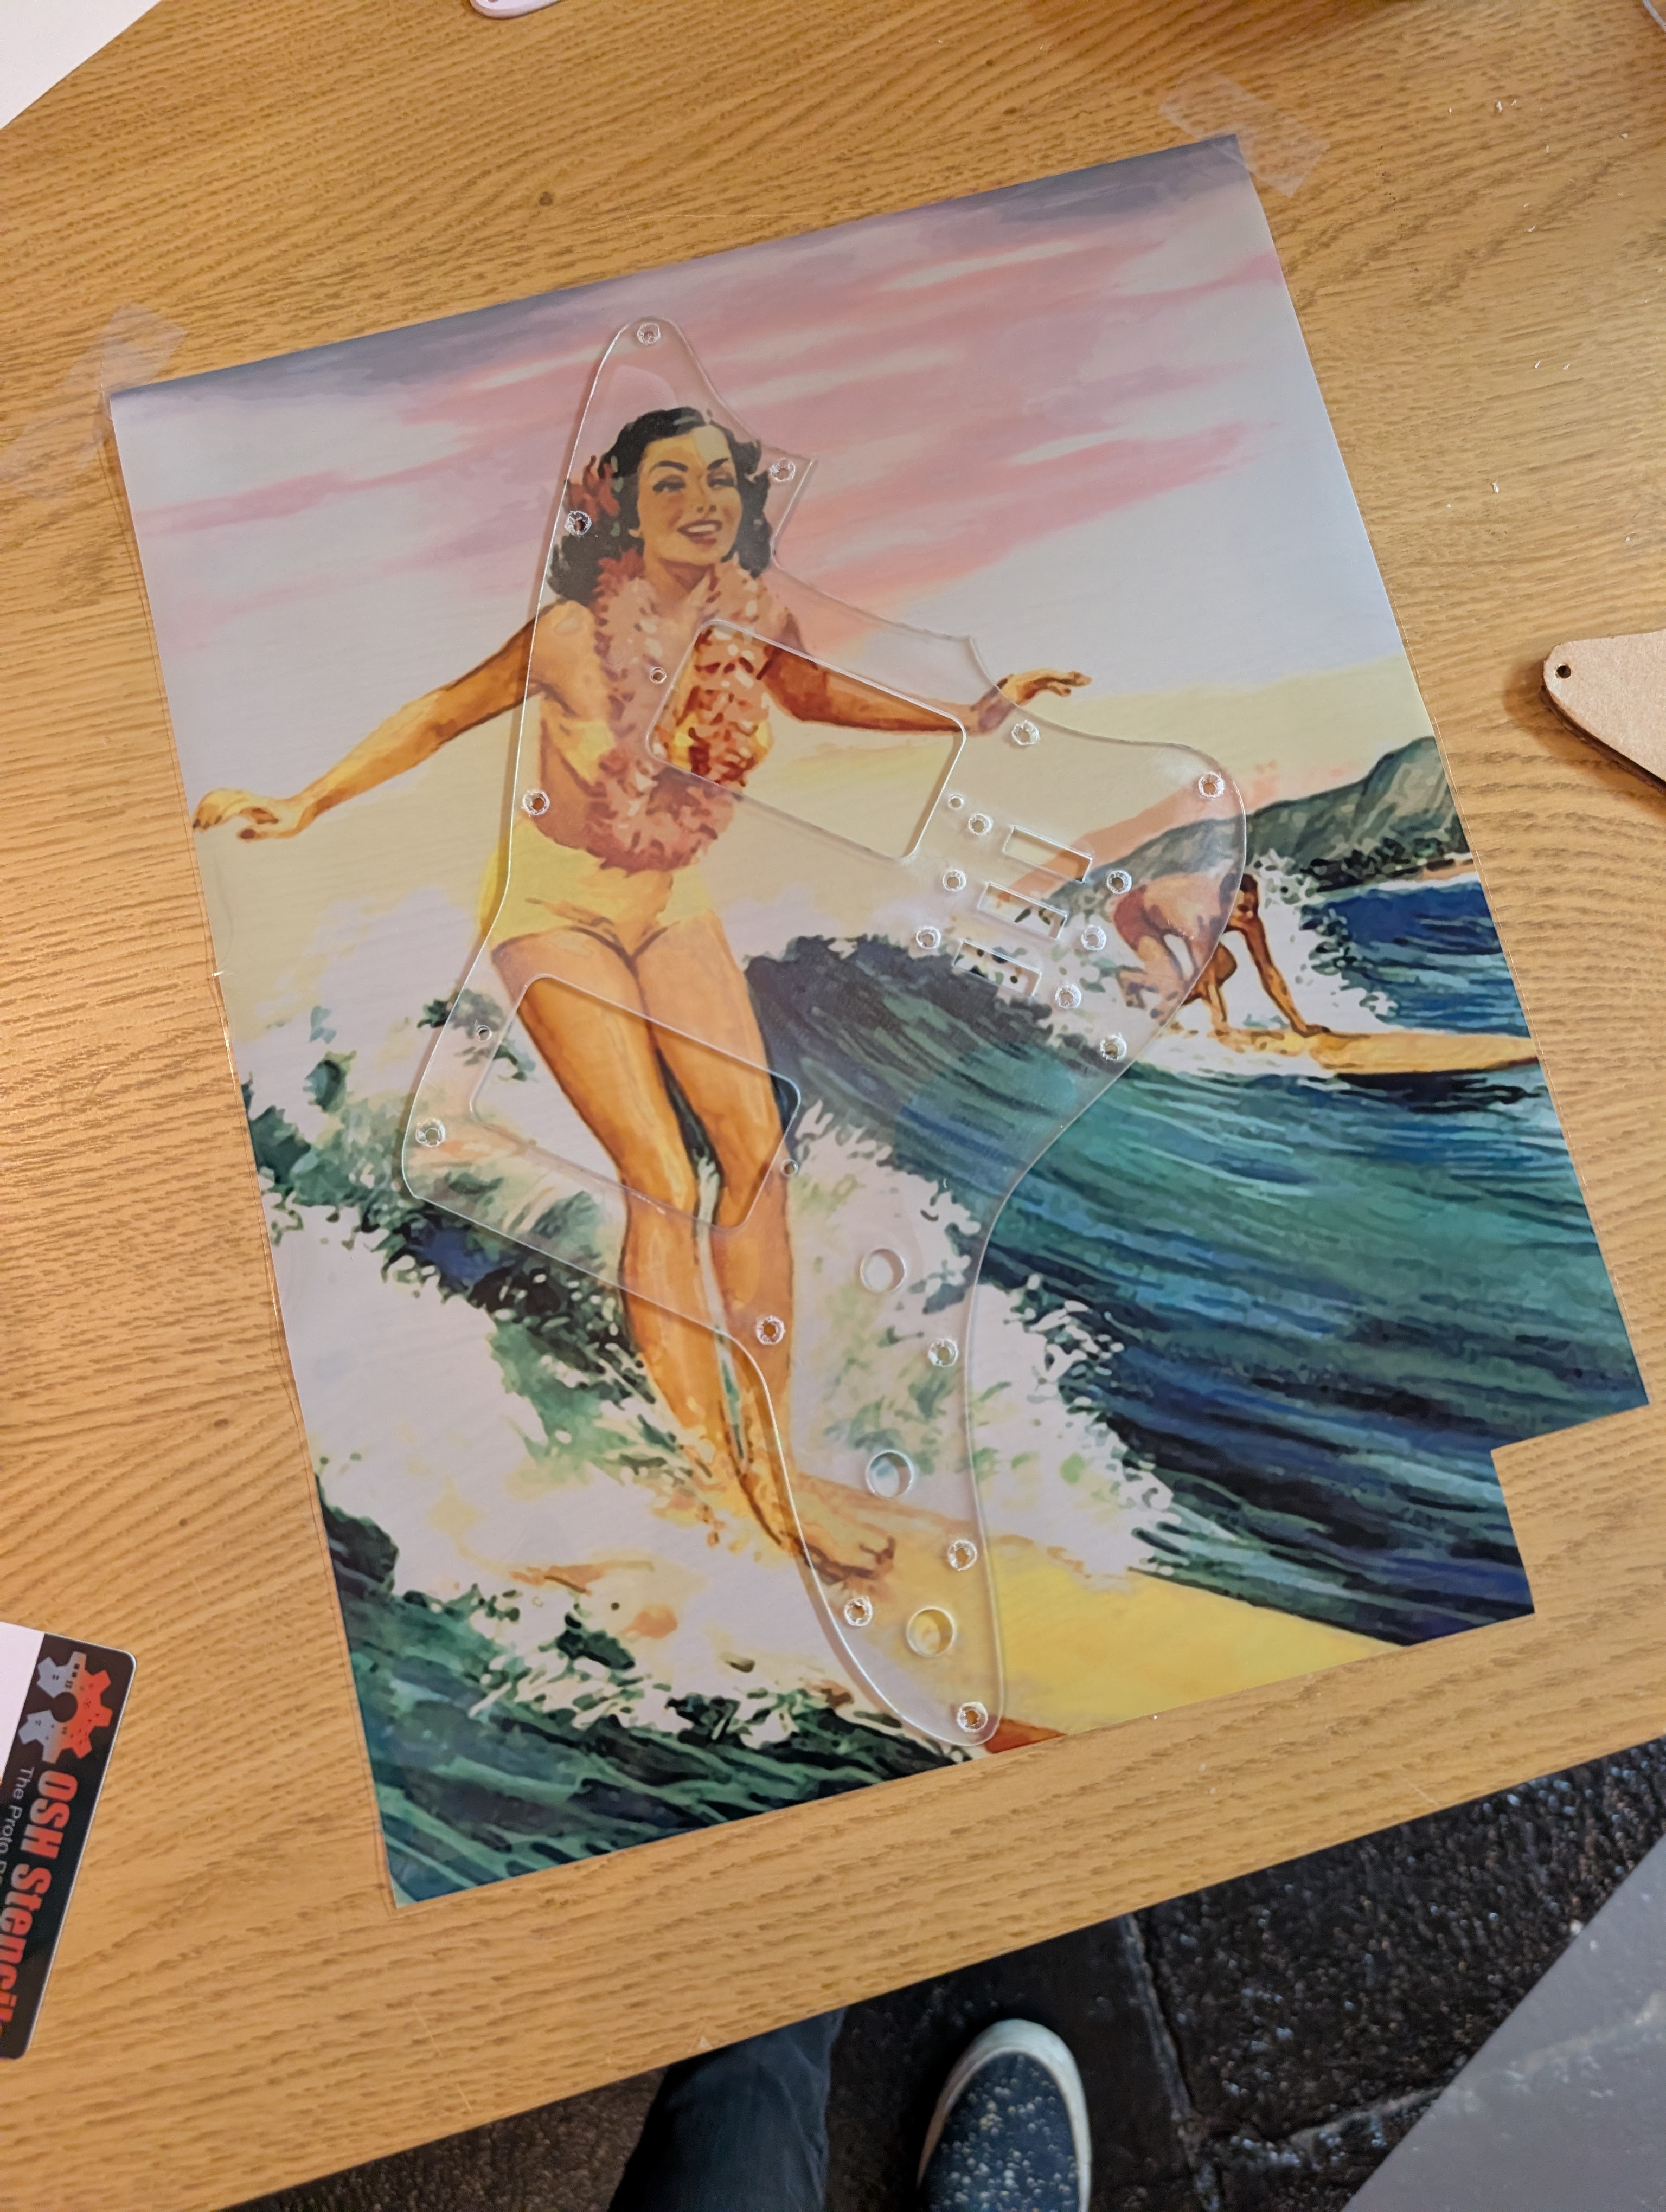
Instead I carefully laid the pickguard down on the sticker. I used a credit card to push the air bubbles out. This should have worked better because the vinyl sticker stretches so it should be able to absorb some misalignments, but I couldn’t get all the bubbles out and it was quite easy to scratch through the graphics.
I used a knife and very carefully cut out the outline and holes. This was easier on straight lines and concave surfaces as I could use the pickguard as a guide and run the knife smoothly and quickly. But for the convex parts I had to cut manually, which was a pain because the vinyl prefers to bend and stretch rather than cut. It wasn’t perfect but good enough.
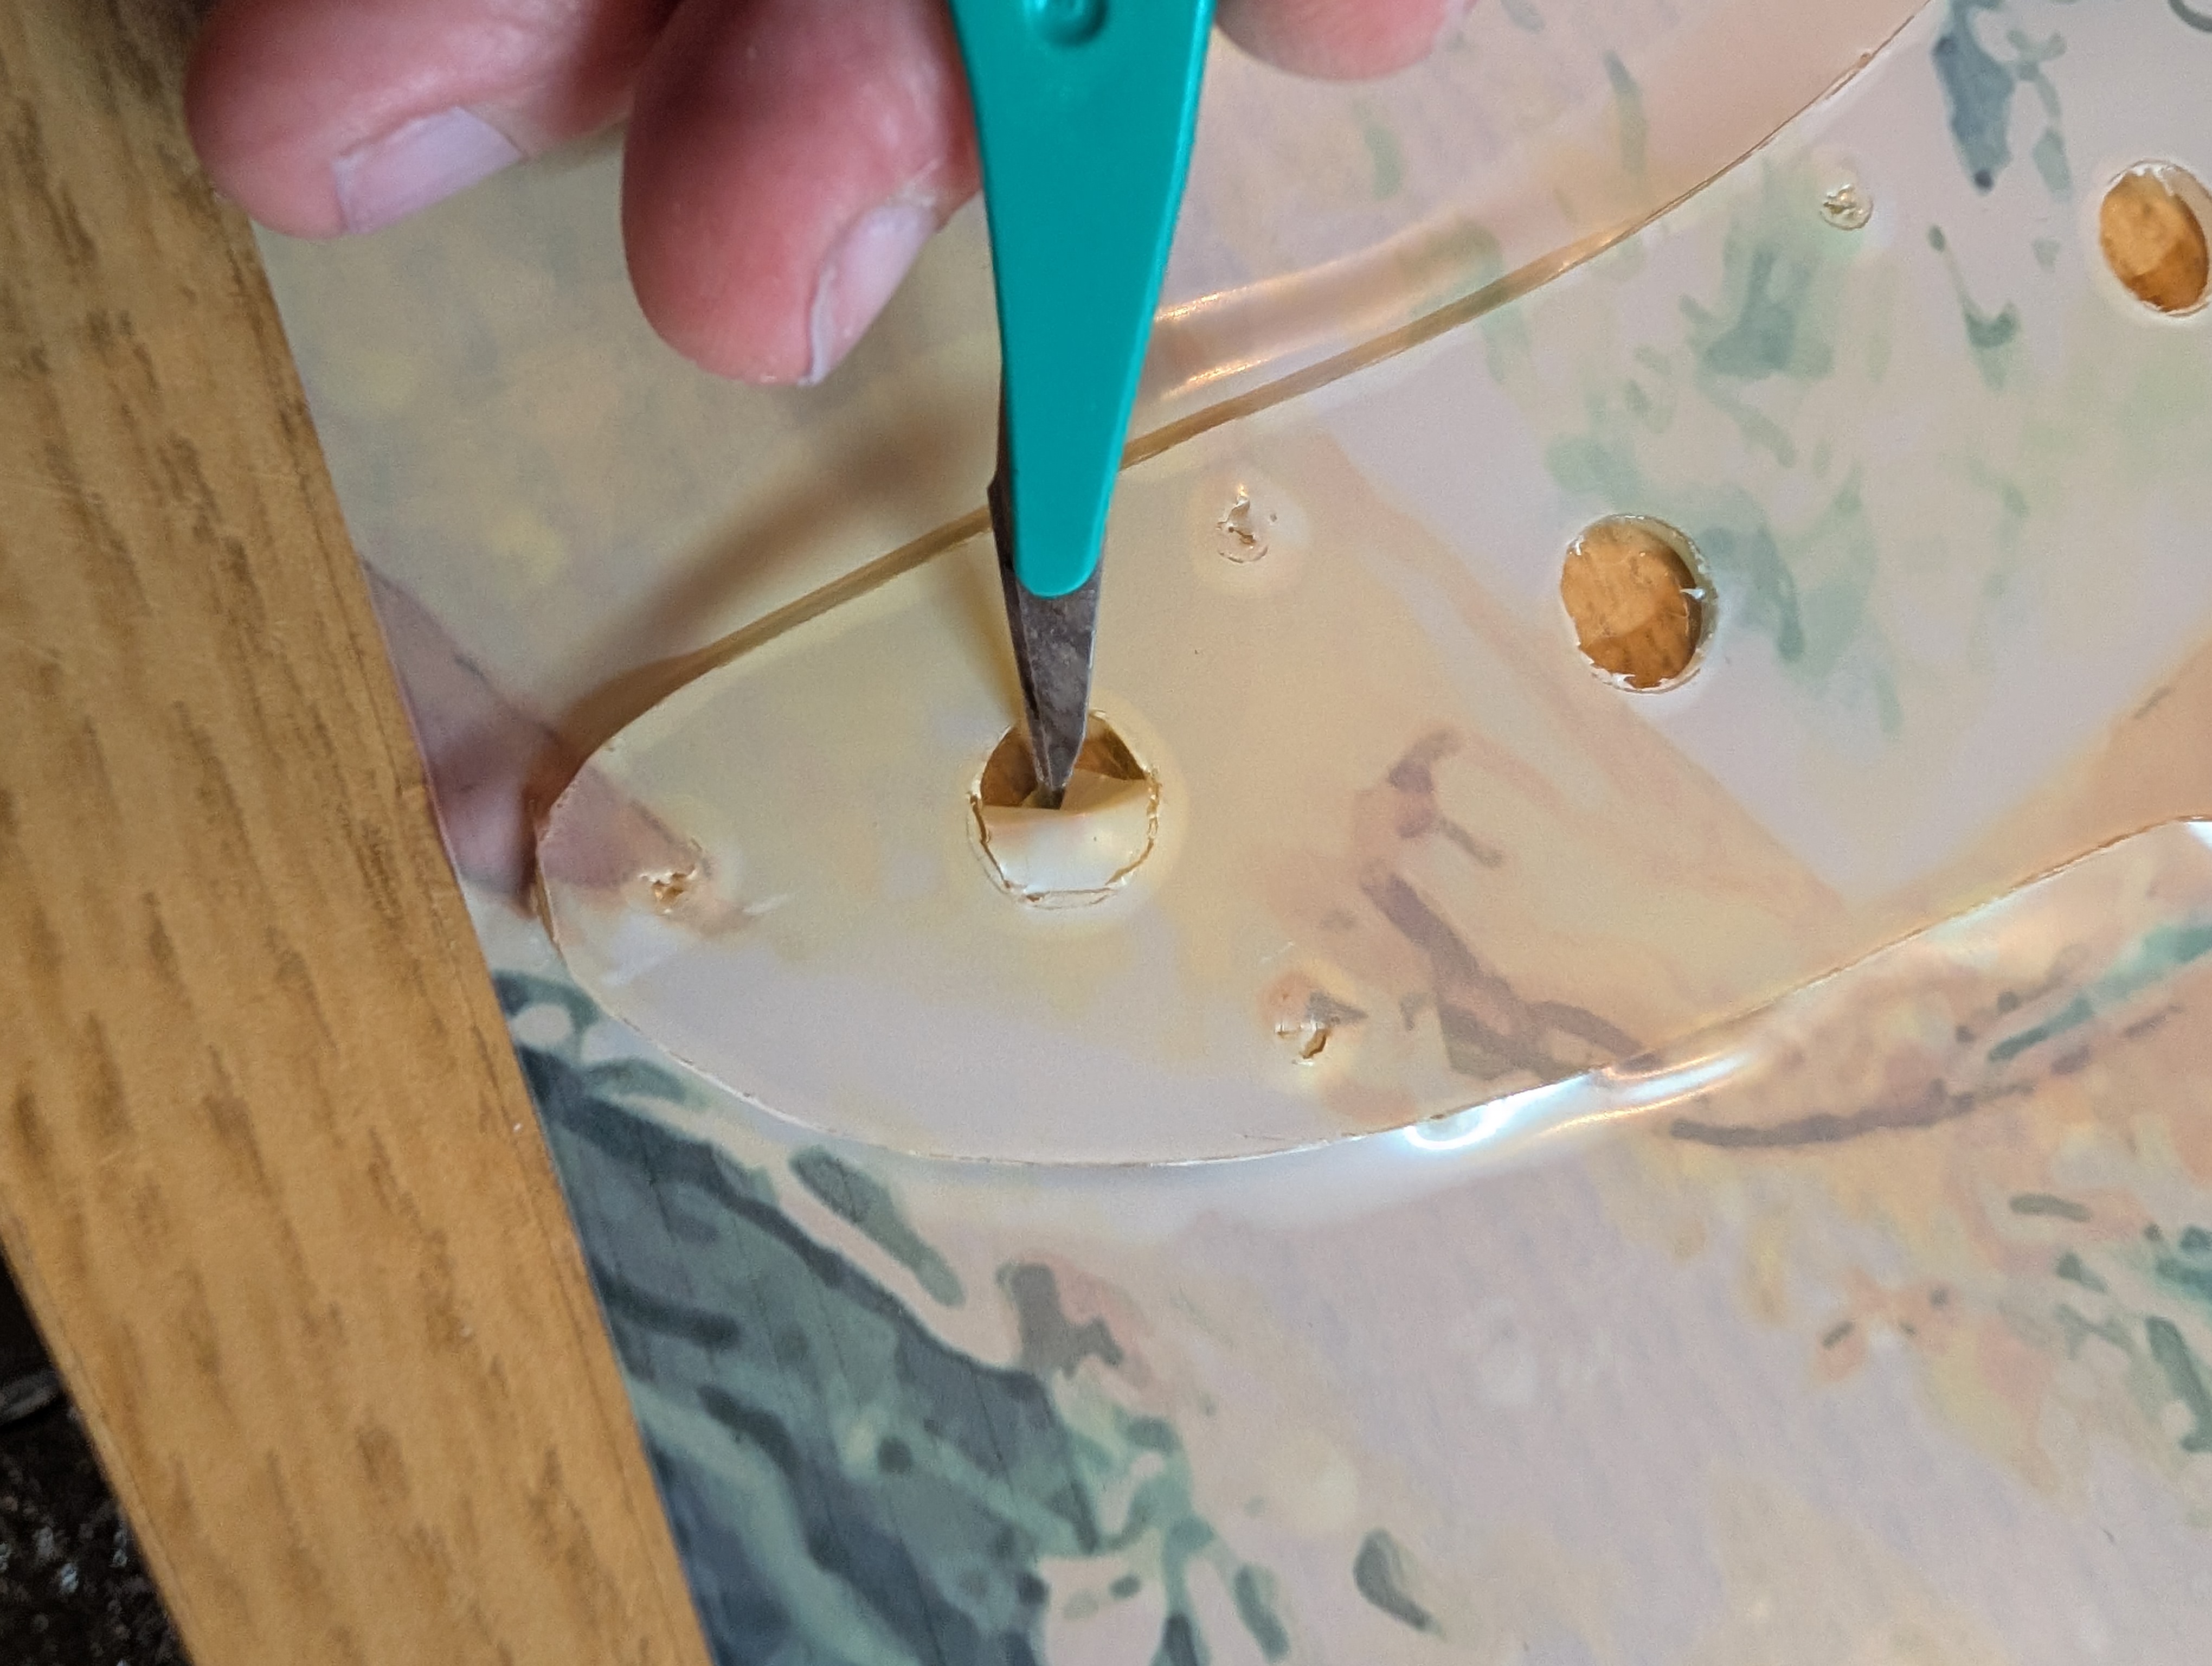
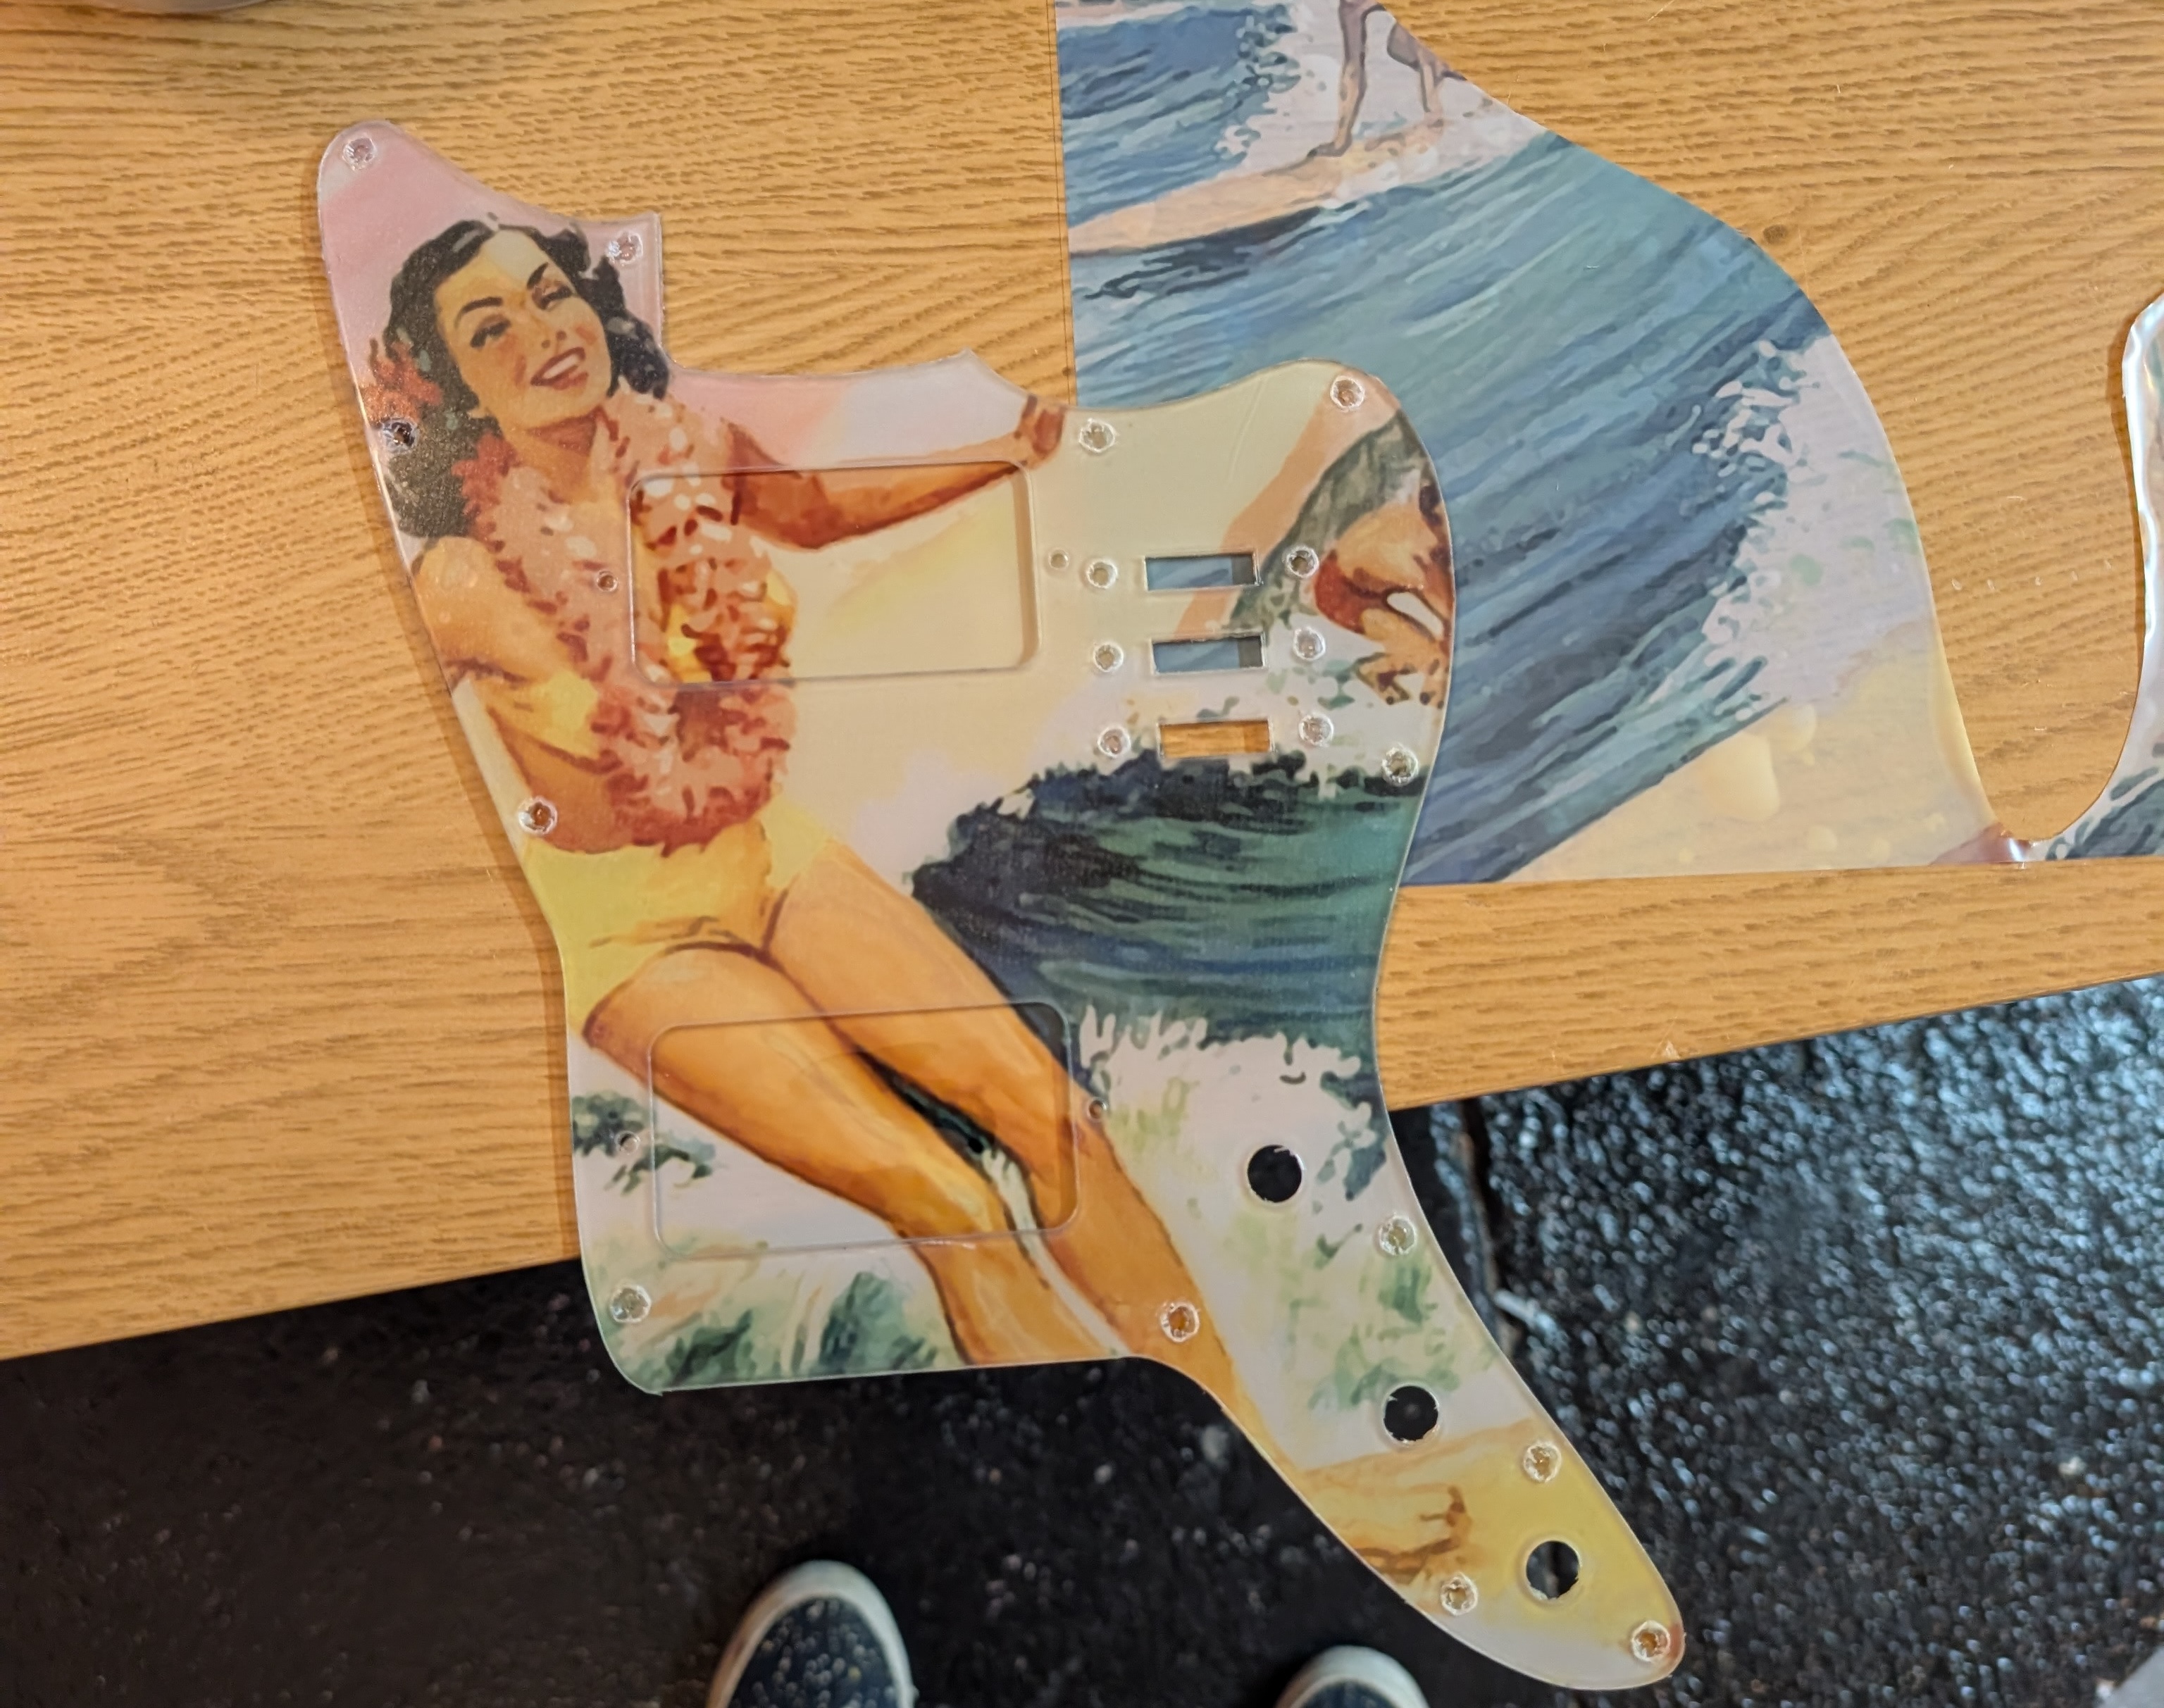
I planned to only put conductive tape over the section with the electronics, however the slight translucency of the sticker caused a shadow beneath that section. I couldn’t remove the conductive tape without tearing off the sticker, so I went ahead and applied the tape to the entire backside. The aluminum fortunately cuts much easier than the vinyl.
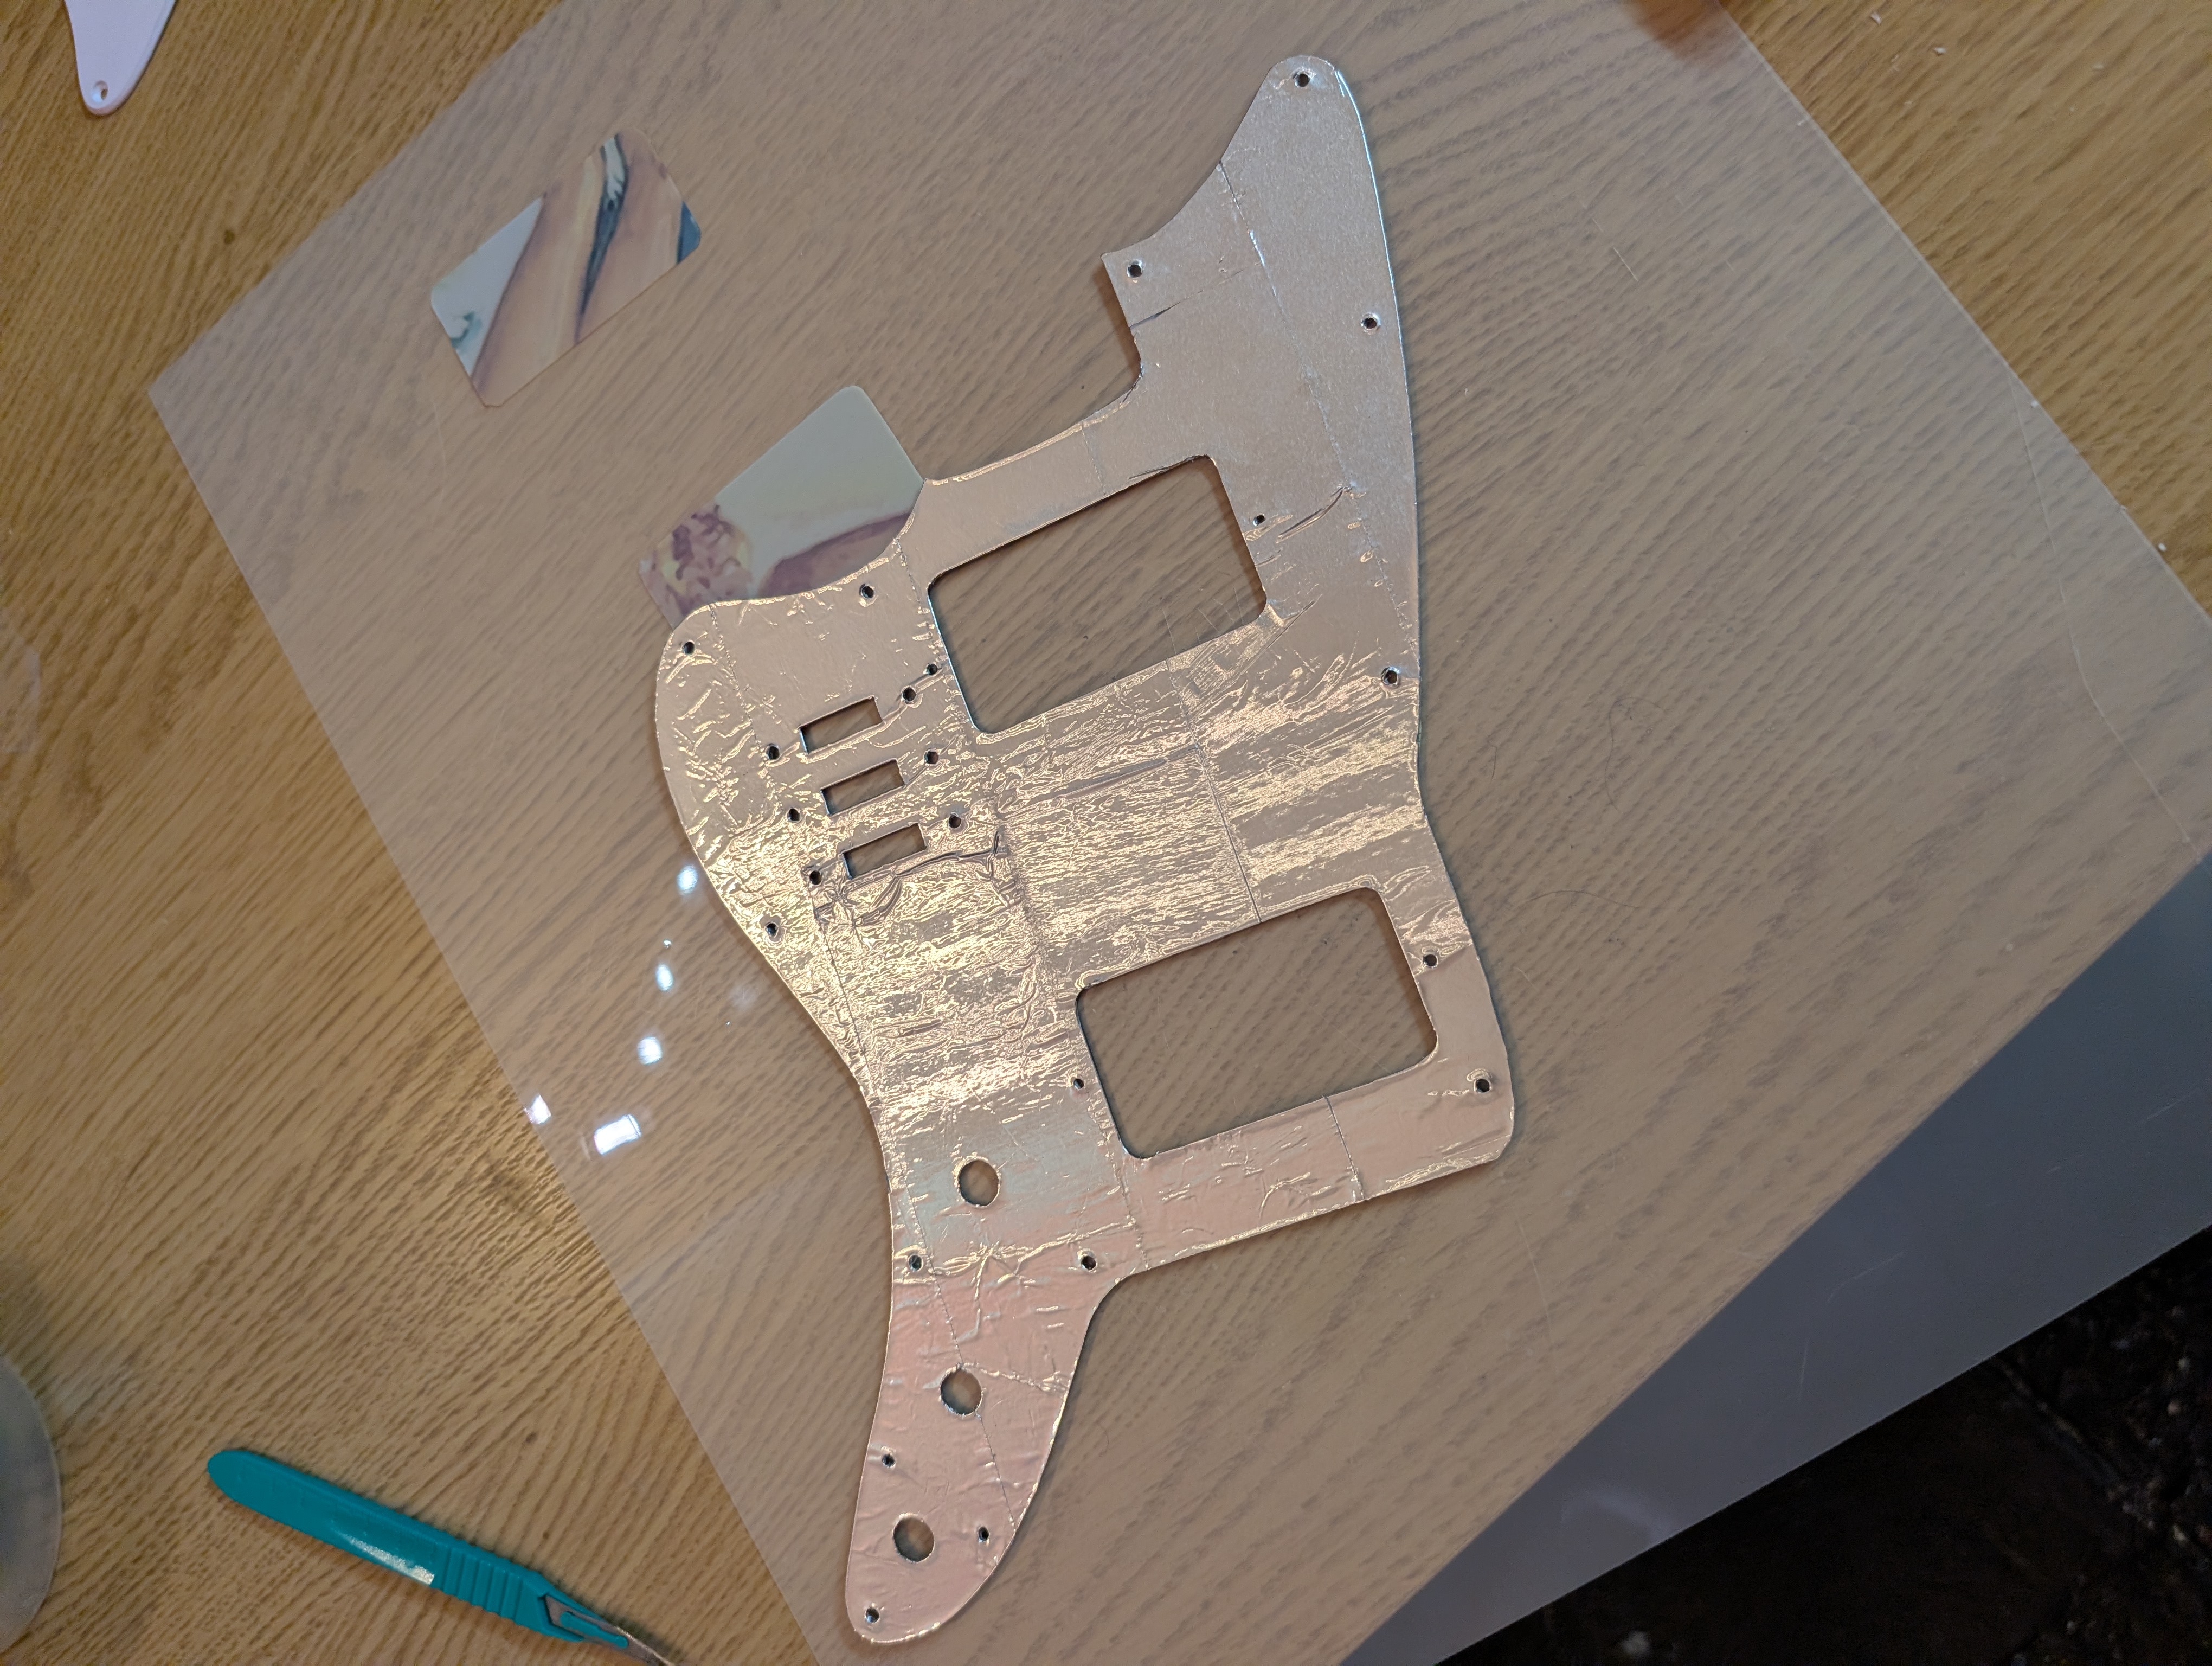
I saved the pickup cutouts of the sticker and laminated them to cover the adhesive. I’m saving them for future use; I might try sticking them on top of the pickups themselves to complete the image.
End result
The last step was new strings and a basic setup. I thought the bridge saddles were interchangeable but it seems some have different length screws (in both dimensions) to account for the neck radius. Also the conductive tape must have shorted out one of the switches, as when using the rail pickup setting on the neck pickup the guitar goes quiet. I didn’t check the electronics before this assembly as they had been working in an earlier pickguard. I’ll have to fix both of these issues the next time I change the strings.
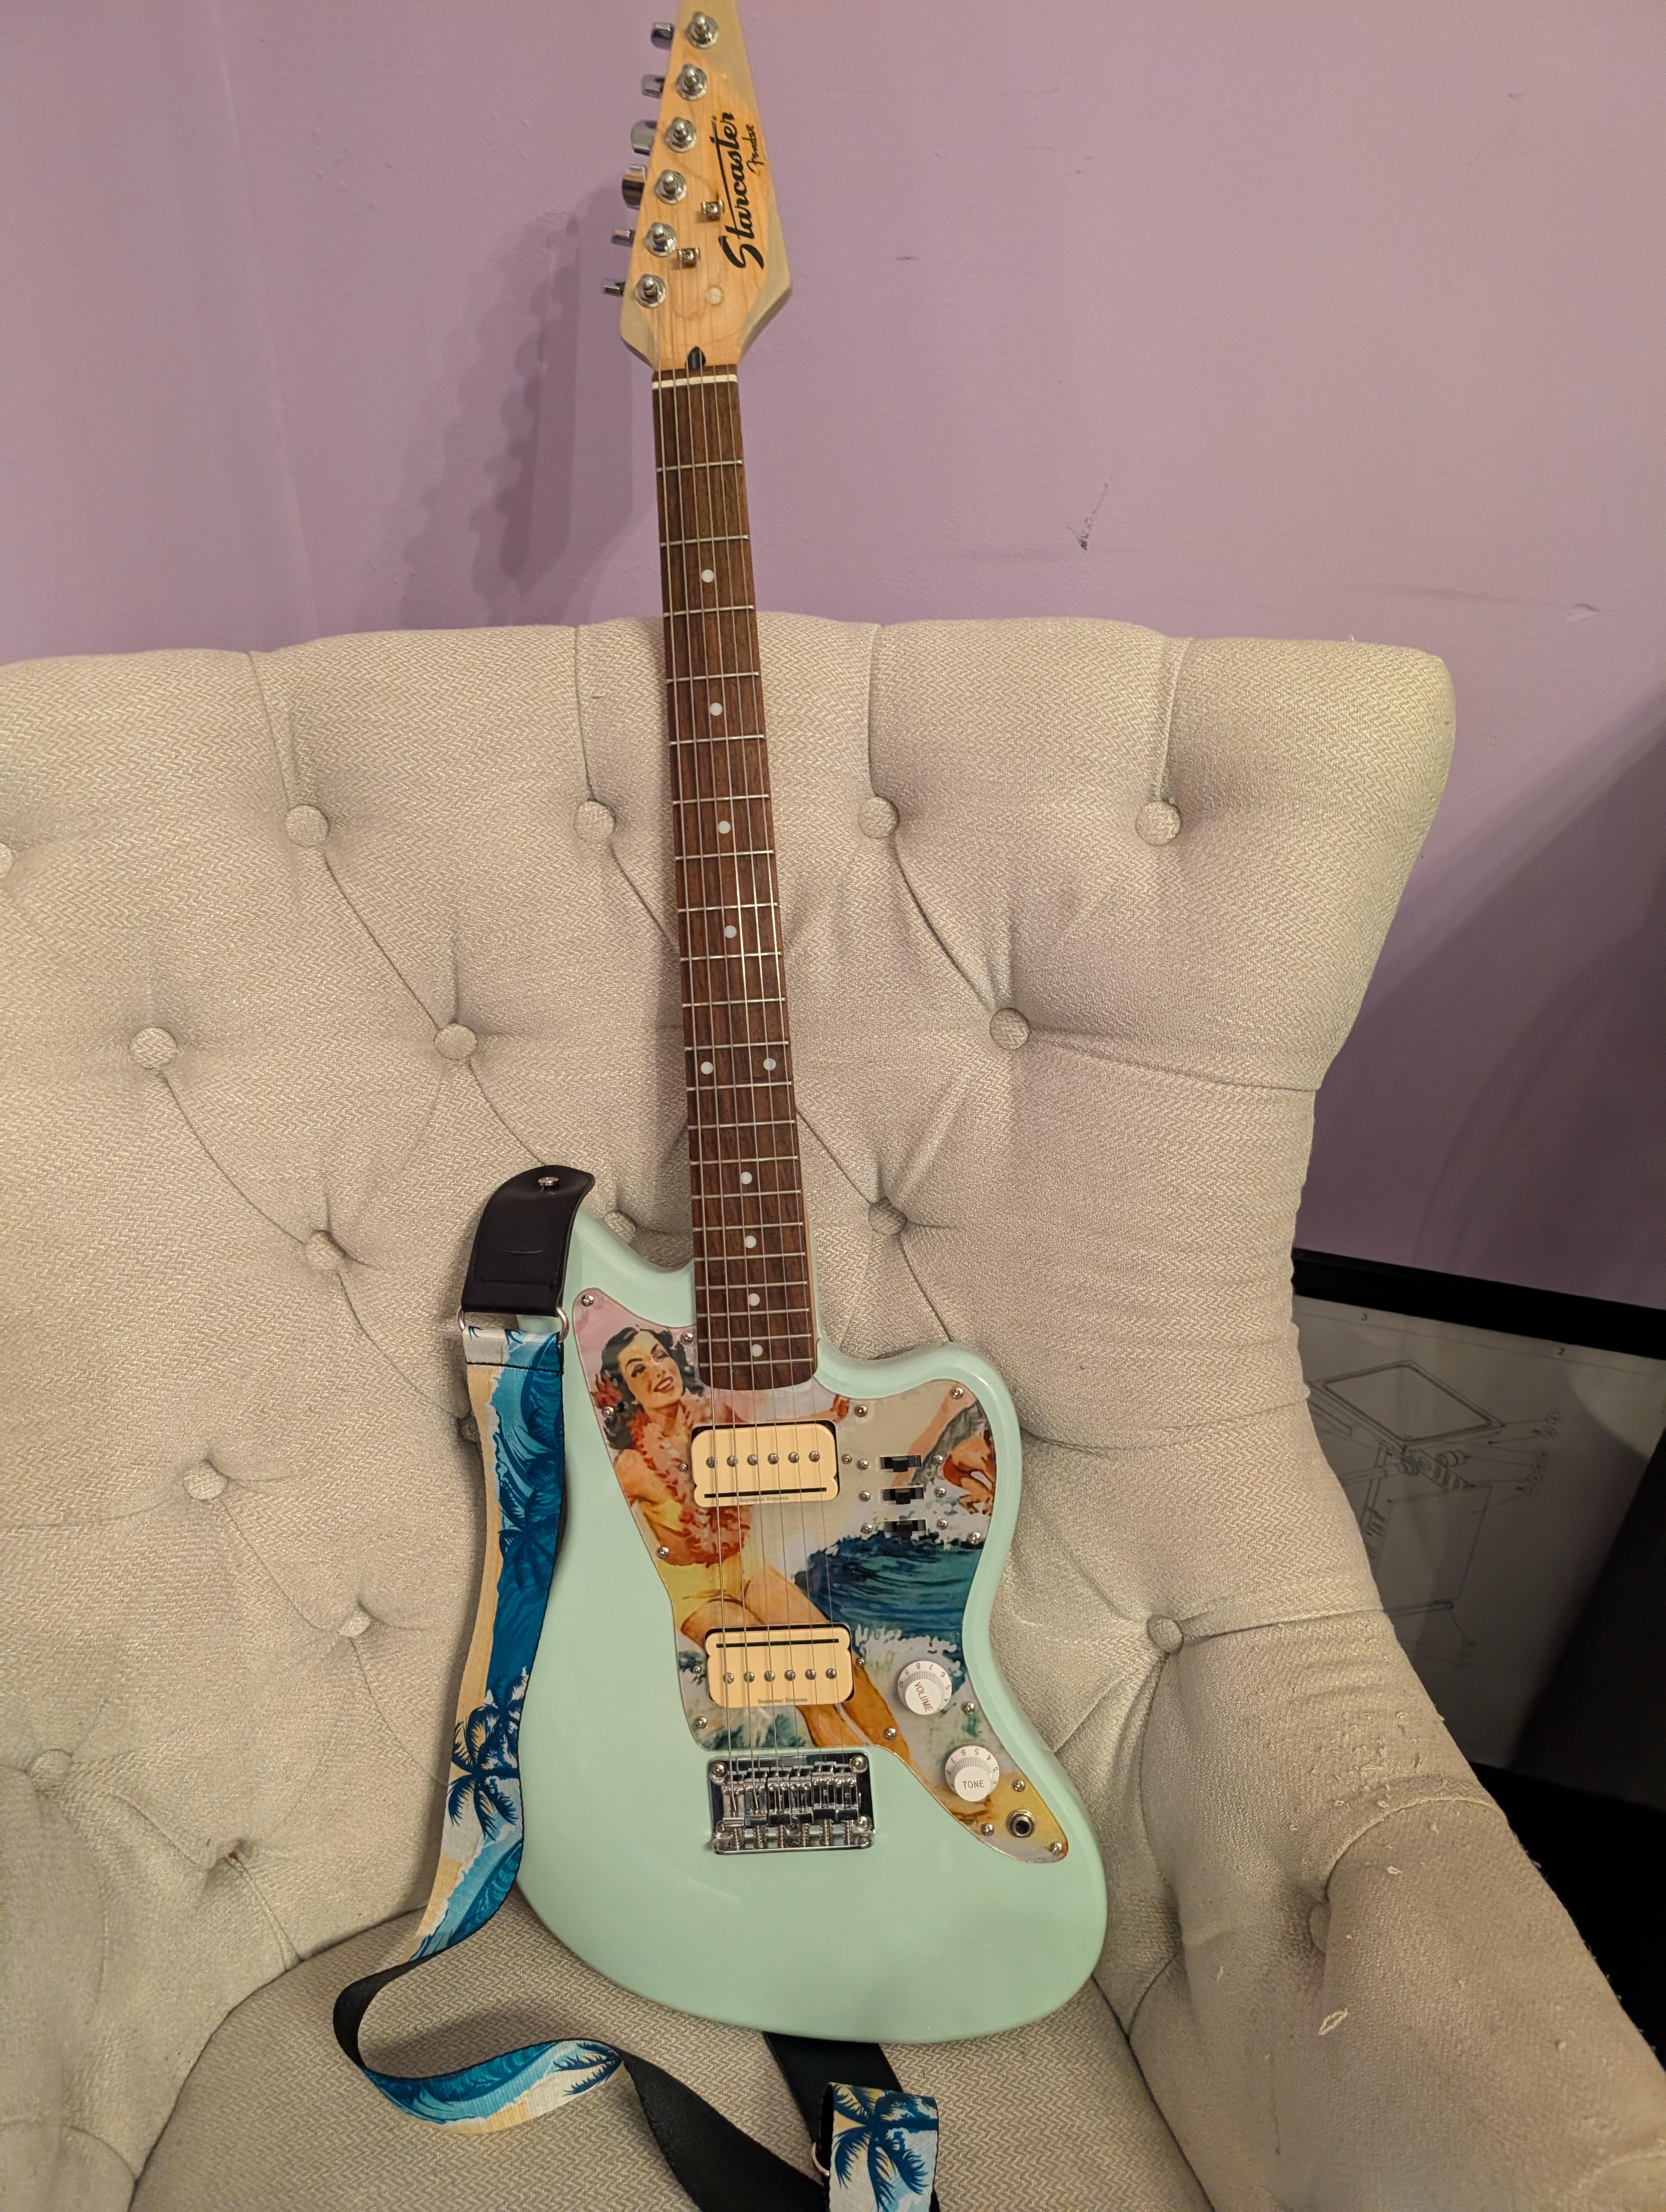
If you couldn’t tell the theme of this post was, “fuck it, ship it.” Lots of things went not quite as desired and I had to make some compromises. Still, overall I’m pretty happy with the way it turned out. Up close you can see some imperfections (bubbles and cracks in the pickguard, damage in the neck), and the dimensions are kinda goofy (the small body makes the neck look very long), but the colors look nice together, and the arrow shape headstock feels like it fits the rest of the guitar thematically. It plays quite well. The neck feels really nice (although the string spacing at the nut is too small for my taste, making cowboy chords hard to play). There’s a decent amount of tonal flexibility out of the pickups. And it’s an incredibly light guitar; I’ll have to weigh it and see what it came in at but it’s a world of difference from my 5-string Jazz bass.
I learned a lot in this process. Next time I’ll be more careful with the router. For pickguard graphics I might try a different approach next time, possibly heat transfer like they use for mugs and such. I’ve got a few other projects to work on first, but I’m already thinking about the next guitar. It would be sick to cut my own body from a wood slab…